Just for Fun

Friday, 2 January 2015

How to Turn an Old Book Into a Clock

How to Turn an Old Book Into a Clock

How to Turn an Old Book Into a Clock | You finally finished -Fifty Shades of Grey- and want to commemorate your life-changing reading experience. One way might be to turn your hardback novel into a clock. Rather than having the literature just taking up space on the bookshelf, by re-purposing it into a useful clock can mix both beauty and utility at the same time.

How to Turn an Old Book Into a Clock

Things You'll Need:

  1. Hardcover book
  2. Cheap wall clock (try the dollar store or check out sales)
  3. X-ACTO/craft knife
  4. Hot glue
  5. Rubber feet (optional)


Choose a suitable hardcover book. Select one that either has personal significance or one that matches the decor or theme of the room. Make sure the book is sturdy and can stand alone without much assistance––a book with between two and three inches (5cm-7.5cm) of pages is your best bet.

"Evaluate your room to determine which colors and style work best. For some rooms, a loud, colorful book cover will enhance your style, while for other rooms, a more romantic, subdued book cover cover will work best. If you're going completely for style, you may want to troll some used book stores for the right fit."
"Consider choosing a book that is symbolic of your life. If a certain book has made a significant impact on your life, it might be the ideal one to transform it into your clock. That way, it will always be on show to remind you of the journey you took with this work of literature."

Purchase a cheap wall clock. You only want the clock for its motor and hands, so it doesn't matter what the rest of the clock looks like. However, do match the hand size and style to the size of your book - if they're too big, the hands may not fit on the cover.

How to Turn an Old Book Into a Clock step 1

Remove the clock’s plastic covering, hands and motor with an X-ACTO knife. Pop open the top and gently remove the contents using the X-ACTO knife.

"Make sure you don’t damage any portion of the clock when taking it apart––the hands can be fragile, so take care when disassembling the clock."

Drill a hole into the center of the book’s cover. First, open the book cover so that you only have to drill a hole in the cover, and not through the rest of the book. Then, carefully drill a hole large enough so that the clock's motor rod can fit through the hole.

How to Turn an Old Book Into a Clock step 2

"Alternatively, consider other areas of the book cover than the center for placement of the hands. You don't have to be “by the book” with this clock––creative license is allowed. For example, if you find a clock with smaller hands, you could place the clock portion towards the top of left of center area of the cover. This could create interest and offbeat appeal."

Prepare the area for the clock motor inside the book pages. The motor will sit nestled inside the pages, so you’ll need to make an exact space using the actual motor as your model. To do this:

"Place the motor behind the opened-out cover on the first page of the book, centered directly behind the drilled hole. Make sure that the motor is perfectly centered, as you will want the motor rod to fit through the cover hole."
"Trace the motor with a pencil and then set it aside. Doing this will provide you with your stencil for cutting out the exact shape in the pages. It helps also to measure the motor’s depth, so you know how far into the book you should cut."

How to Turn an Old Book Into a Clock step 3

How to Turn an Old Book Into a Clock step 4

How to Turn an Old Book Into a Clock step 5

Using the X-ACTO knife, cut into the pages so that you create a hole for positioning the clock motor. Carefully slice away at the pages to create a nook for the motor. Drop the motor into the nook from time to time and try to close the book to determine if you have cut far enough into the book yet. Consider cutting fewer pages at first and checking the depth regularly until it's just right.

Close the book cover and line up the clock motor rod with the book cover hole. Now you can assemble the clock using the hands and any decorative items to accentuate your new book clock.

Snap the clock hands onto the clock motor rod on the front cover. If the book tells the entire “story” and completes the decor, you may want to stop here. This is the basic body of the clock. You may like it the way it is or decorate it further:

"Match the room decor. Add decorative numbers, jewels or small items to embellish it. You could also decoupage the clock with pictures to follow a theme."
"Place the book clock on display. Check that it sits solidly without being likely to fall. This may require steadying the book or adding rubber feet. "

Tips

  • Consider using padding if the clock motor doesn’t fit snugly into the pages. If you’ve carved out a section that is either too big or awkward, try wadding up pieces of duct or masking tape and padding the surrounding interior so it holds the motor snugly in place.
  • Use a hot glue gun to affix any decorative items to the book clock.
  • Insert a fresh set of batteries so you can enjoy the clock the minute after you create it.
  • If your child is making the clock, always supervise the entire process and consider handling the cutting yourself.
source: http://www.wikihow.com/Turn-an-Old-Book-Into-a-Clock

Atlantica Online Player Guide - Crafting Guide - 1

Atlantica Online Player Guide - Crafting Guide - 1

You will find many things to consider when you begin crafting products. You have to consider the long-term of the crafting ability. Such things as, am i going to craft sure weapons? am i going to craft rings? What's most lucrative crafting item to market? & there are many more items to request. I'll attempt to simplify it for you personally though. Have you contemplated one last formation? That could choose your your crafting desires. You are able to craft as plenty of & anything you require but concentrating on 1-3 capabilities is suggested. Before you begin crafting fundamental essentials questions you need to consider when beginning a crafting career. Clearly whatever selection you've selected may have generally multiple weapon types & most certainly armor types. At greater levels your gears are craft only so obtaining a high crafting level in what kinds of gears you need is really a lovely suggestion!

A few of the more lucrative kinds of crafting are RINGS and Deposits at the start of the overall game. I've made millions selling rings and deposits for 20k and 100K+ professionally. And it takes only possibly 15-half an hour to develop a batch of 15 and only offered or enchanted for greater level and equip in your mercs or hero. Just in case you will be considered a ring crafter its a good idea to become a very enchanter. You can't enchant rings without sure deposits. And so far as I know deposits are rare and that i question when they can drop whatsoever. So as you can tell individuals have no choice but to purchase in the market which equals you a lot of funds!

Most Lucrative Crafting Types!

Above picture is really a skill trainer, three occasions you become so terrible where one can change your skill will turn orange. After this you may come for this trainer & change your abilities one stage further or several levels for the way lots of points you've gathered. The greater levels you upgrade the greater level products that you could start crafting. Skill trainers only allow you to upgrade to level 10 where you'll then have 2 other available choices to carry on improving your craft level.

Study from other gamers (suggested)

You'll find crafters of greater levels around the community craft list or by shouts in game which are constantly being sent by others. You be capable of train abilities to other people also by shouting on the planet chat also. Higher level crafters can get bonuses for teaching your crafting levels & additionally, you will get points for teaching others also. This can be a mutually beneficial situation for everybody. Whenever you find anybody that you need to train crafting or else you require to understand crafting from you've got to be lower level than them. If this sounds like the situation you'll be able to add these to buddies list & they/you are able to click actions within the whisper window of the recently added mate & click actions--> share info. You'll be able to locate that which you require to train or another person will discover that which you require to understand & then share the data along with you.
What Is Decoupage Crafts

What Is Decoupage Crafts

Decoupage Crafting

Decoupage is definitely an art of crafting or designing any items or materials by sticking color papers inside it. Normally metals, wooden contaminants, ceramic items can be used for decoupage crafting because the majority of the items both at home and office will get broken or damaged when years go. So these broken items receive existence by way of decoupage crafting, in which the damaged parts or even the broken items are decorated with colored papers and every layer from the product are sealed with varnishes to provide a beautiful appearance for that product. By way of decoupage crafting, you can decorate our office or home using the broken contaminants.

Decoupage craft is among the hobbies for the majority of the creative people. For the reason that decoupage crafting is discovered to be funny, creative and affordable too. The fundamental factor on doing decoupage crafting is Cut and Paste method. We simply need scissors to chop the images, newspapers or photos that to become cut and lastly the glue, to stay the images or photos around the items. Decoupage craft is straightforward while you eliminate the image, glue the image around the object, and canopy the item using the decoupage to safeguard it. Most people use decoupage crafting for flower plans, desktop articles, ceramic kitchen articles, tea cups, etc. Some people make money by way of decoupage crafting making it as being profession. Decoupage crafting is definitely an old and revert talent that was popular in 18th century but nowadays it will get rinse because of we've got the technology. Decoupage craft makes way to print Invitation card, sales brochure, Posters, etc. The items which are through with decoupage may also send as gift for events like house warming, wedding, engagement, kids birthday parties, etc. Decoupage crafts could be different gift when in comparison towards the normal gift products.

Because of rise of technology, you will find companies offering Decoupage crafts and it is items online at affordable rate. And That I prefer world wide web.dufexcrafts.com is the best place to locate a myriad of decoupage crafts and it is items. Dufex crafts are focused on offering various Printed decoupage crafts for example Equine in Twilight, Swan dreams, Sea buddies, Wood Fairy, T he moon dance, Wave of equine, Wolf and Cub, etc. Together with this decoupage printed crafts, we offer Craft peel off stickers, craft add-ons, Christmas cards, etc. Dufex crafts would be the leading retailers on delivering decoupage crafts and it is items online, worldwide. Purchase decoupage items on the internet and craft the broken contaminants.

Thursday, 1 January 2015

Crafts For Kids To Learn And Have Fun

Crafts For Kids To Learn And Have Fun

Most children love crafts since they're fun and artistic. Many crafts will also be educational and may be used to train kids of any age about amounts, letters, creatures, shapes, styles, science, as well as tales about history or stories. The truly amazing factor about crafts is any kid can participate, as well as their end product does not need to be "perfect."

Crafts are for sale to any age and learning levels. You will find fun activities for childcare and preschool kids, families, as well as grandma and grandpa to savor using their grandchildren. You will find also educational crafts for each season so there's no boring moment all year round!

For more youthful kids, you will find crafts using paper, crayons, soaps, putty, play dough, peel off stickers, photos, toys, etc. For kids age range 7-9, crafts are frequently a bit more challenging and could involve watercolors or finger offers, beads, photo albums, scrapbooks, tie-dye materials, book covers, lunch boxes, dolls, and lots of other products. For older women, you will find some excellent quilting books for children with a number of designs and colours. Older boys enjoy sports-related crafts or perhaps scientific experiments!

Educate with Play Dough Crafts for children

Whether you are a parent or gaurdian attempting to spend time together with your child, or perhaps a childcare or preschool teacher, play dough supplies a fun, clean activity to produce creatures, amounts, as well as words. With play dough, kids may use their imagination (as well as their hands) to mold a variety of shapes. Challenge these to mold certain figures or creatures they see inside a book. Or, get several kids along with play dough to produce a whole village. Get yourself a book of play dough quality recipes to assist the children shape their most favorite animal or character. You'll find play dough quality recipes for flowers for example daffodils and roses, snowmen, pigs, snails, felines, turtles, faces, fruit, seeing stars, frogs, structures, furniture, meals, and lots of other good examples.

Puppet Shows

For older kids, train these to create their very own puppets and set on the puppet show. The show does not need to be elaborate... however it should certainly be fun for the children! Decide on a theme or story for that play from the book or play script, and supply photos or sketches from the figures therefore the kids could possibly get a concept of how you can create their puppets. Provide materials and directions for creating puppets. Assist with individuals parts which are difficult, but permit the children to make use of their creativeness.

Use Crafts to Train Gardening Techniques

Kids enjoy watching things grow, especially plants or meals they grown by themselves. You will find many educational crafts for children dedicated to gardening. You are able to train these to make their very own flowerpots or garden bins. Ask them to decorate planters utilizing their own method and materials, after which plant flowers, fruit, or veggies. You may also make funny cup figures from foam cups by planting grass because the hair! Just draw an interesting face around the cup, add wealthy soil, sprinkle some grass seed products on the top, and give a little water every few days.

Cooking Crafts

Baking is yet another fun activity to accompany crafts. Have your children make their very own cookie jars after which bake some snacks to put within the jars. Or, bake a cake and train these to decorate it with frosting, sprinkles, along with other cake ornaments. Buy various shapes of pans and blades to make cookies, snacks, and bread. Also, make creative popcorn goodies for any movie evening.

Other Educational Craft Styles

Another styles which are both educational and fun include holiday crafts, toilet roll crafts, bible crafts, egg crate masterpieces, sewing or quilting, beading, face painting, and switch flop crafts. Whatever theme you need to try, make sure to locate an age-appropriate book with craft ideas. Craft books can display you the way to produce crafts for children from beginning to end and which materials and supplies are essential. For youthful quilters, quilting books offer detailed instructions on their own level.

Crafts for children provide you with a wonderful chance to train your kids about every aspect of existence. Research the numerous craft assets online today for additional fantastic ideas!
How to Cover a Book With a Paper Folder

How to Cover a Book With a Paper Folder

How to Cover a Book With a Paper Folder | You could be in a situation where you are imposed an agenda or planner with an unpleasant cover. You could also be in a situation where you need to cover a book you like in an artistic way. If you're switching from folders to binders, it's your lucky day because this tutorial can be made with an old paper folder.

How to Cover a Book With a Paper Folder

Things You'll Need:

  1. A paper folder
  2. An agenda, which is smaller than one of the pages of the folder
  3. Tape
  4. A cutter
  5. Rope or an elastic (optional)

Step by Step:

  1. Cut the middle of the paper folder and a little piece of paper that will be used for the binding. Remove the metal brackets and keep them for later use.
  2. Bend one page of the folder around one of the cover pages of the agenda.
  3. Cut anything that comes out from behind.
  4. Tape the cover onto itself. Don't put tape on the book, that way you'll be able to reuse the cover for same sized books. 
  5. Tape the binding on one of the covers.
  6. Fit it in place.

How to Cover a Book With a Paper Folder step 1

How to Cover a Book With a Paper Folder step 2

How to Cover a Book With a Paper Folder step 3

How to Cover a Book With a Paper Folder step 4

You are now done with the DIY fabric Cover a Book With a Paper Folder! You can trace cuts on the covers and pass metal brackets through them. Then use a little elastic twisted onto these brackets and secure it in place. (source: http://www.wikihow.com/Cover-a-Book-With-a-Paper-Folder)
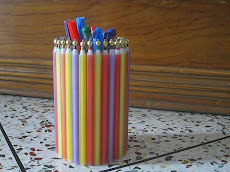
How to Make a Pen Holder Using Old Pens

How to Make a Pen Holder Using Old Pens

How to Make a Pen Holder Using Old Pens | This article will show you how to make a pen holder with your empty pens!

How to Make a Pen Holder Using Old Pens

Things You'll Need:

  1. Some empty Pens
  2. A bottle or glass
  3. Hot Glue or Super Glue (preferably super glue)
  4. A piece of paper
  5. Beads
  6. Regular glue or glue stick
Step by Step:

  1. Find any kind of glass or bottle.
  2. Wrap a paper around the glass and stick it with regular glue.
  3. Find some empty pens.
  4. Stick the pens (using the super glue) around the bottle.
  5. Find some beads.
  6. Stick the beads with super glue.

How to Make a Pen Holder Using Old Pens step 1
Wrap a paper around the glass and stick it with regular glue

How to Make a Pen Holder Using Old Pens step 2
Stick the pens around the bottle

How to Make a Pen Holder Using Old Pens step 3
Stick the beads

You are now done with the DIY fabric Pen Holder! (http://www.wikihow.com/Make-a-Pen-Holder-Using-Old-Pens)
How to Make a Bow Pencil Case

How to Make a Bow Pencil Case

How to Make a Bow Pencil Case | When you need a new pencil case, whether it's for back-to-school, for a fun change or because your old one has broken, consider making a bow pencil case. It's cute, simple-to-make, and doesn't require any sewing.

How to Make a Bow Pencil Case

Things You'll Need:

  1. A large rectangular fabric piece (need not have perfect edges)
  2. Hot glue/ super glue (hot glue is preferred)
  3. A strip of another fabric (preferably a color contrasting to the large fabric.) It should be the length of the width of your large piece of fabric, plus enough extra material for you to tie a knot.
Step by Step:

Preparing the Fabric

  • Fold a large rectangular fabric piece in half.
  • Trim the side edges.
  • Trim the top portion. This side should also be as neat as a pin! 

How to Make a Bow Pencil Case
Preparing the Fabric

Assembling the Pencil Case

  • Stick the two edges together with super glue or hot glue (preferably hot glue).
  • Place the fabric strip in the center. Ensure that there is enough extra fabric on the side with the opening to tie a bow, and the other end sticks off of the other side.
  • Stick down with glue.
  • Stow your stationery and supplies in the case.
  • Flip it over.
  • Tie a knot.

How to Make a Bow Pencil Case
Place the fabric strip in the center

How to Make a Bow Pencil Case
Flip it over and Tie a knot

You're done with your DIY fabric bow pencil case! As shown in the image, this fun and easy pencil case will look like a little bow. (source: http://www.wikihow.com/Make-a-Bow-Pencil-Case)

Wednesday, 31 December 2014

Homemade Crafts A Creative And Constructive Way To Deal With Monotony

Homemade Crafts A Creative And Constructive Way To Deal With Monotony

Despite our daily chores there exists a sufficient time. The majority of us dont utilize our spare time constructively. We waste our time idle talking, involving in non-give up eating and watching idiot box and turning out to be inactive. But could also get rid of the time by doing a bit of kind of constructive work. It's possible to make homemade crafts in the waste materials that's usually fund in the home. The fabric that's declared thrown away might be worth observing for but actually is of effective use. You can use it to create homemade things both at home and make the majority of the free time.

These homemade craft could be gifted towards the family members. Homemade gifts are affordable, fun to create and treasured by all. They've the private touch just like a priceless possession. It is made from the elements of affection and creativeness. Here a number of fast and simple homemade crafts that may be attempted in your own home:

Eggshell Trinket Box:

The egg spend that's generally thrown away may be used to decorate trinket box. Its an expense-efficient way of giving mother-of-gem effect. The finished box is remarkably strong, and you will find no flaking egg shells after two jackets of decoupage and 2 heavy jackets of iridescent gem fresh paint.

Materials Needed: Wooden box, glue, damaged whitened egg shells, whitened craft fresh paint having a gem, Glass Fresh paint in ivory, fresh paint brush, strong plastic bag, pin to interrupt in the eggshells, screwdriver.

Procedure:

Take damaged egg shells and crush all of them with a moving pin or heavy object.

Spread a sheet of paper and begin using the very first coat of damaged eggs around the box.

Paste egg shells using the whitened glue.

Apply eggs one for reds at any given time.

Use the medium then sprinkle on the generous pile of damaged eggshells. Spread it and press lower firmly using the fingers. Continue such as this before the entire outdoors top of the box is included.

Recycled Calendar Prints:

Material Needed: Calendar, Picture Frame, Fresh paint, Sandpaper, Varnish, Glue.

Procedure:

Bring your favorite calendar picture and take away the dust.

Have a photo frame and canopy it entirely with old finish.

Varnish the colored frame. To provide sheen towards the photo frame use the paste wax. It does not produce the annoying glare that's just in case of some varnishes.

Attach the calendar picture using the glue on a bit of heavy card board.

Light Switch Plate:

It isn't just an ornamental home accent but additionally coordinates using the light switches to match the ambiance of the home.

Material Needed: Colorful wallpaper border, light switch plate, hiding tape, scissors

Procedure:

Go ahead and take wallpaper and put the switchplate. Center it around the design that you have selected. Within this situation, I centered the opening for that switch in the center of the birdhouse.

Use pencil to stipulate the switch hole around the front from the wallpaper.

Cut a line lower the middle of the rectangle with sharp scissors.

Form two flaps to fold towards the back like small wooden shutters, at the very top and bottom from the rectangle.

Start the wallpaper to check out the rear.

Put your cutout around the front from the switchplate, aiming the switch holes and fold the wooden shutters towards the back.

Fold the switch hole flaps towards the back. And fold the outdoors edges towards the back, simultaneously careful to create neat corners.

Attach the switchplate towards the wall making your brand-new room vibrant and lighted.
Plus Size Fit And Flare Black Dress

Plus Size Fit And Flare Black Dress

Plus Size Fit And Flare Black Dress

This awesome picture collections about Rehearsal Dinner Dress For Mother Of The Groom is available to download. We collect this wonderful photo from online and choose the best for you. Rehearsal Dinner Dress For Mother Of The Groom images and pictures selection that uploaded here was carefully chosen and uploaded by our team after selecting the ones which are best among the others. So, finally we make it and here these list of wonderful Rehearsal Dinner Dress For Mother Of The Groom image for your ideas and information purpose as part of our exclusive updates collection. So, take your time and find out the best Rehearsal Dinner Dress For Mother Of The Groom images and pictures posted here that suitable with your needs and use it for your own collection and personal use.

Love your curves in our flattering selection of fit & flare dresses. From everyday dresses to evening gowns, shop plus size dresses online at city chic. The store will not work correctly in the case when cookies are disabled. Regular price $129. 00 as low as $64. 50.

The most flattering silhouette for your figure; Regular price $69. 00 as low as $27. 60. Regular price $59. 00 as low as $23. 60. Women's blue plus size print fit & flare dress. $99. 98 free shipping. Plus size effortless fit & flare maxi dress. $59. 99 $41. 99. Extra 10% off $100+ use code: In addition to being packed with perfectly styled retro details, these delightful dresses have a universally flattering fit.

City Chic Dobby Long Sleeve Fit & Flare Dress | Nordstrom

City Chic Dobby Long Sleeve Fit & Flare Dress | Nordstrom
Image by pinterest.com

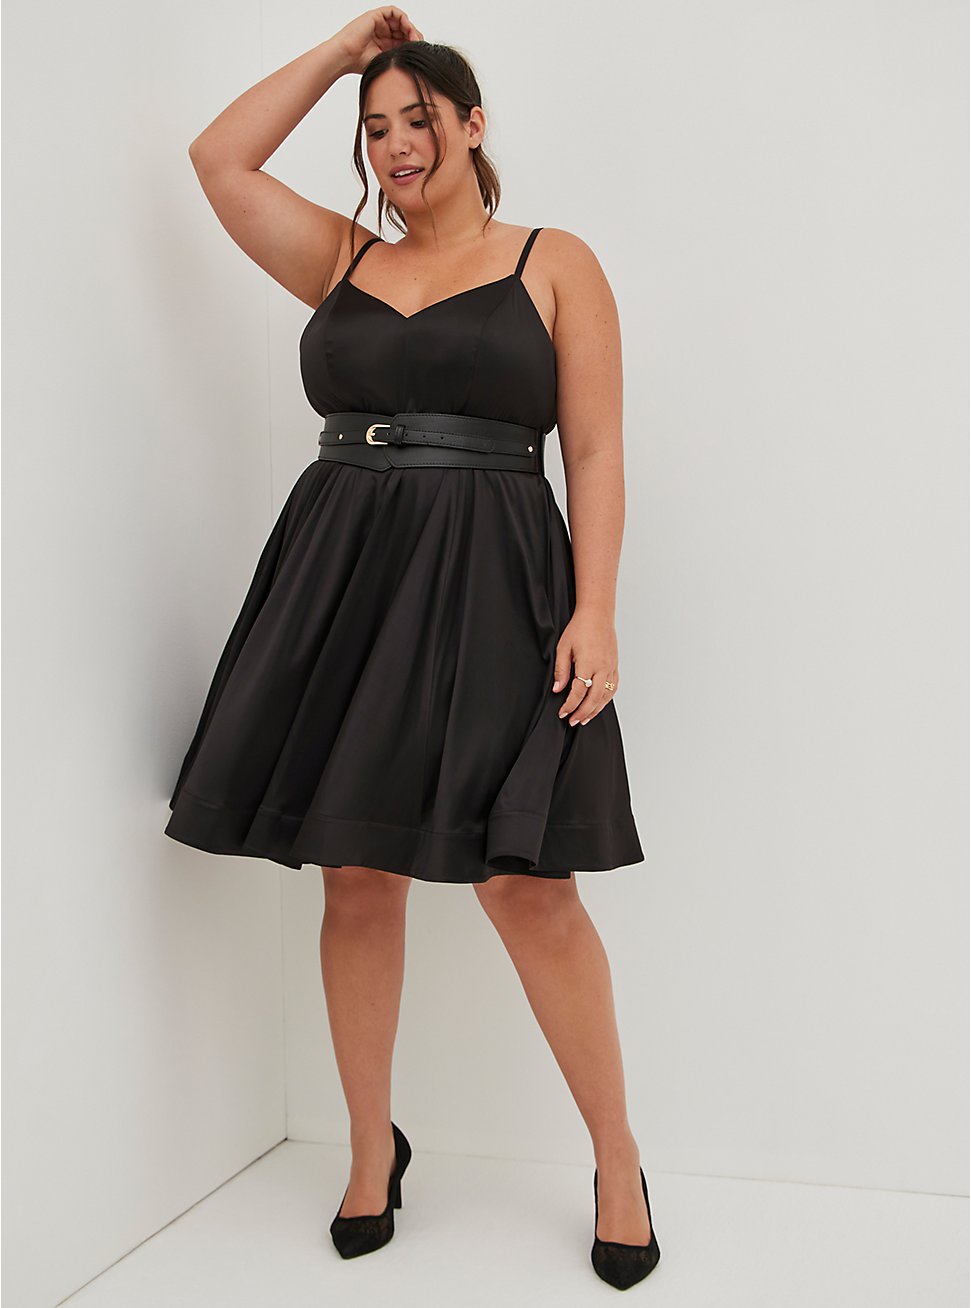
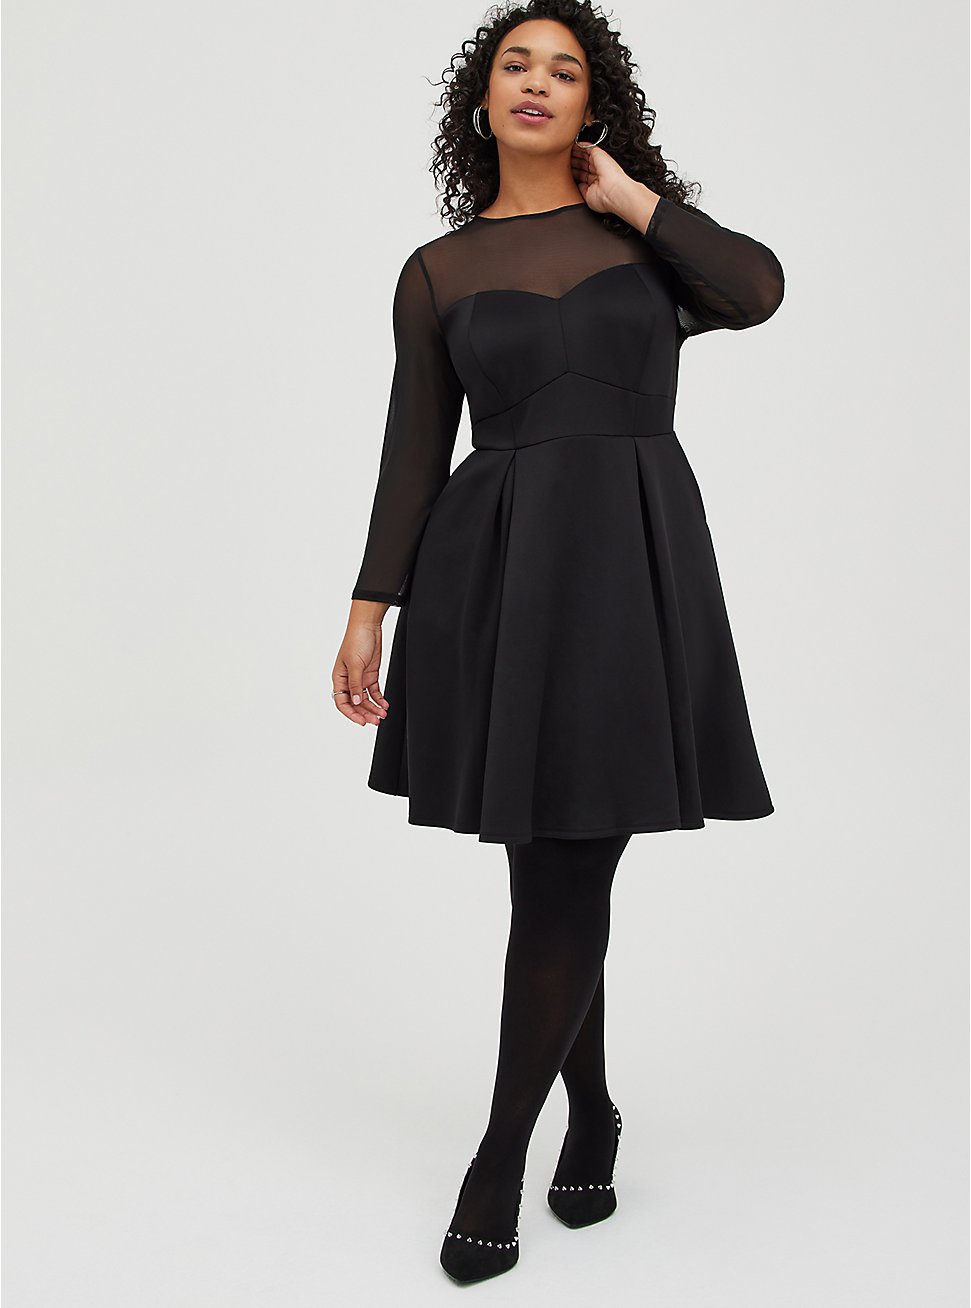
Plus Size - Sweetheart Fit & Flare Dress - Dream Satin Black - Torrid

Plus Size - Sweetheart Fit & Flare Dress - Dream Satin Black - Torrid
Image by Torrid

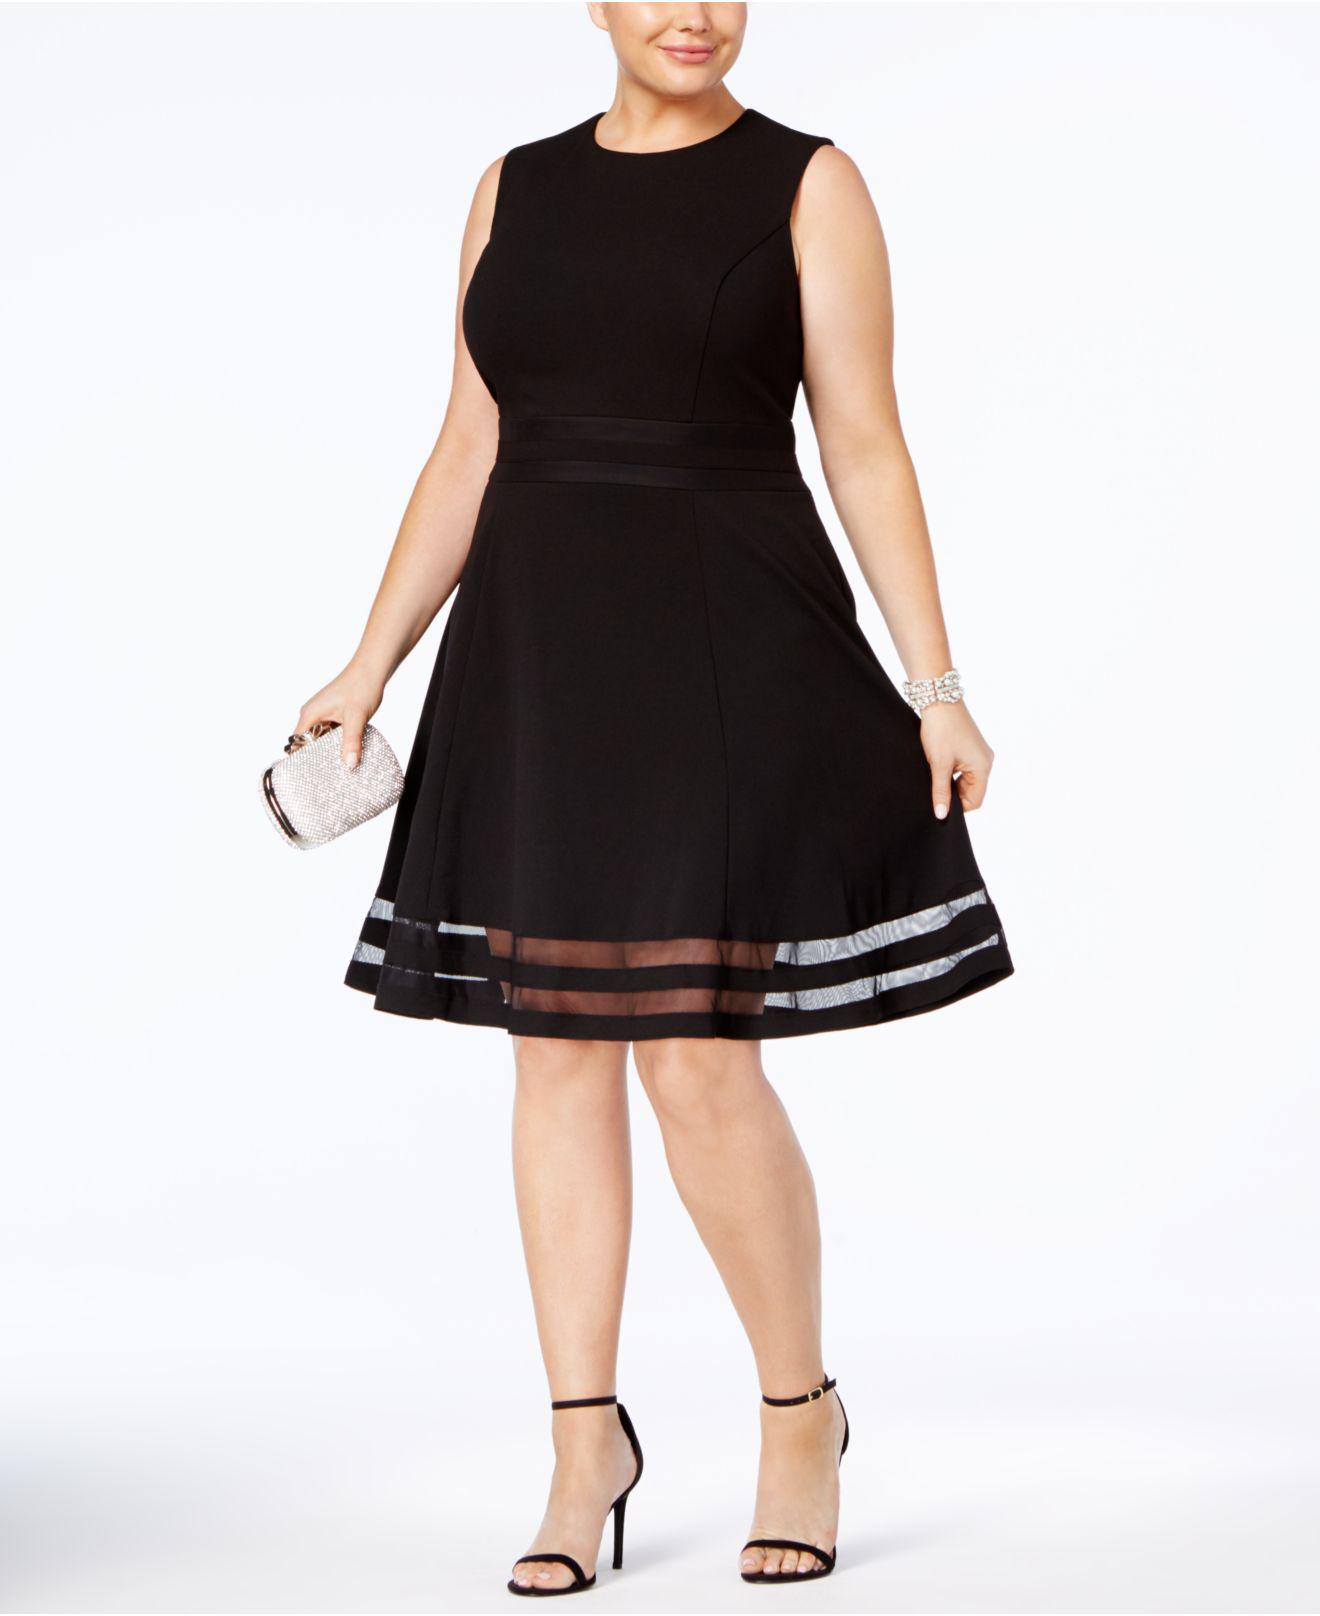
Calvin Klein Synthetic Plus Size Illusion-trim Fit & Flare Dress in Black | Lyst

Calvin Klein Synthetic Plus Size Illusion-trim Fit & Flare Dress in Black | Lyst
Image by lyst.com

Unique Vintage Plus Size Black Garber Fit & Flare Dress - ShopperBoard

Unique Vintage Plus Size Black Garber Fit & Flare Dress - ShopperBoard
Image by shopperboard.com

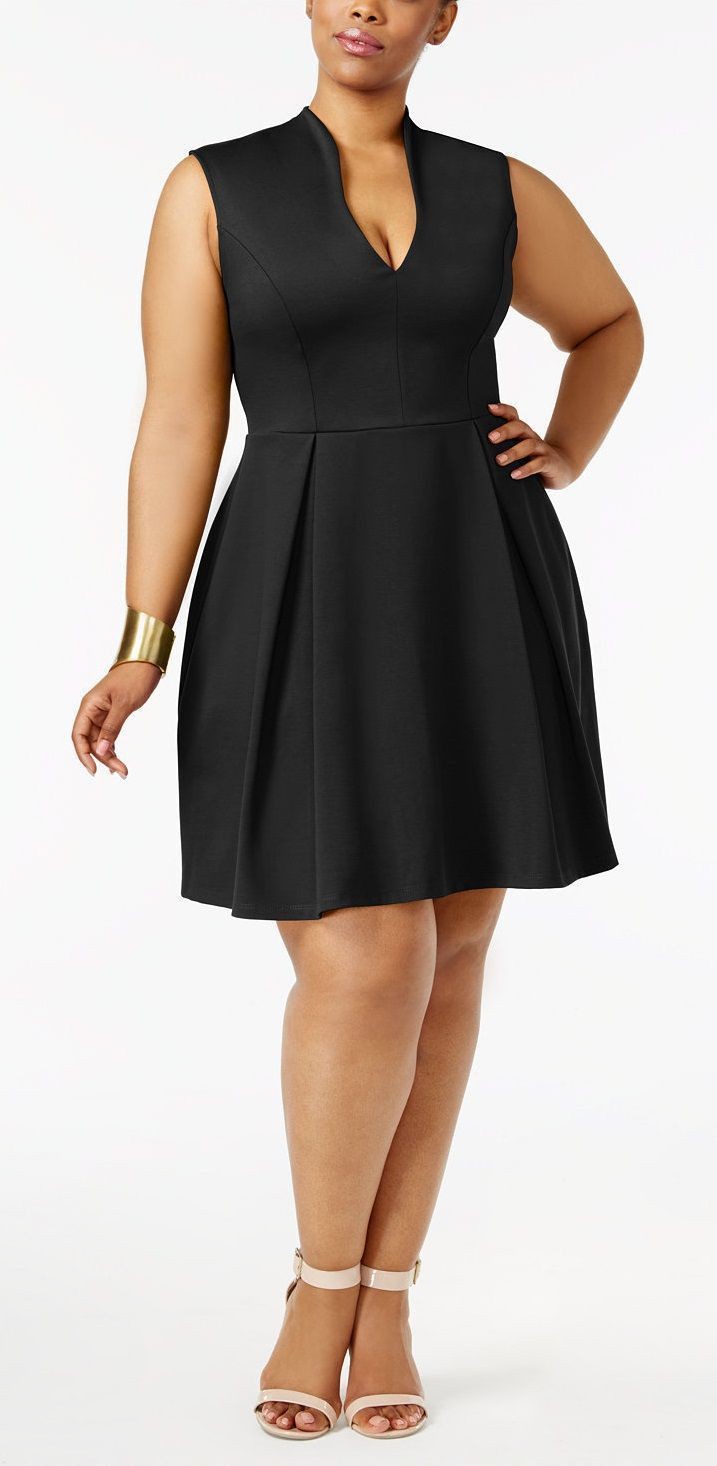
Soprano trendy plus size pleated fit flare dress | Plus Size Black Outfit Ideas | Clothing sizes, Plus size outfit, Plus-size clothing

Soprano trendy plus size pleated fit flare dress | Plus Size Black Outfit Ideas | Clothing sizes, Plus size outfit, Plus-size clothing
Image by stylevore.com

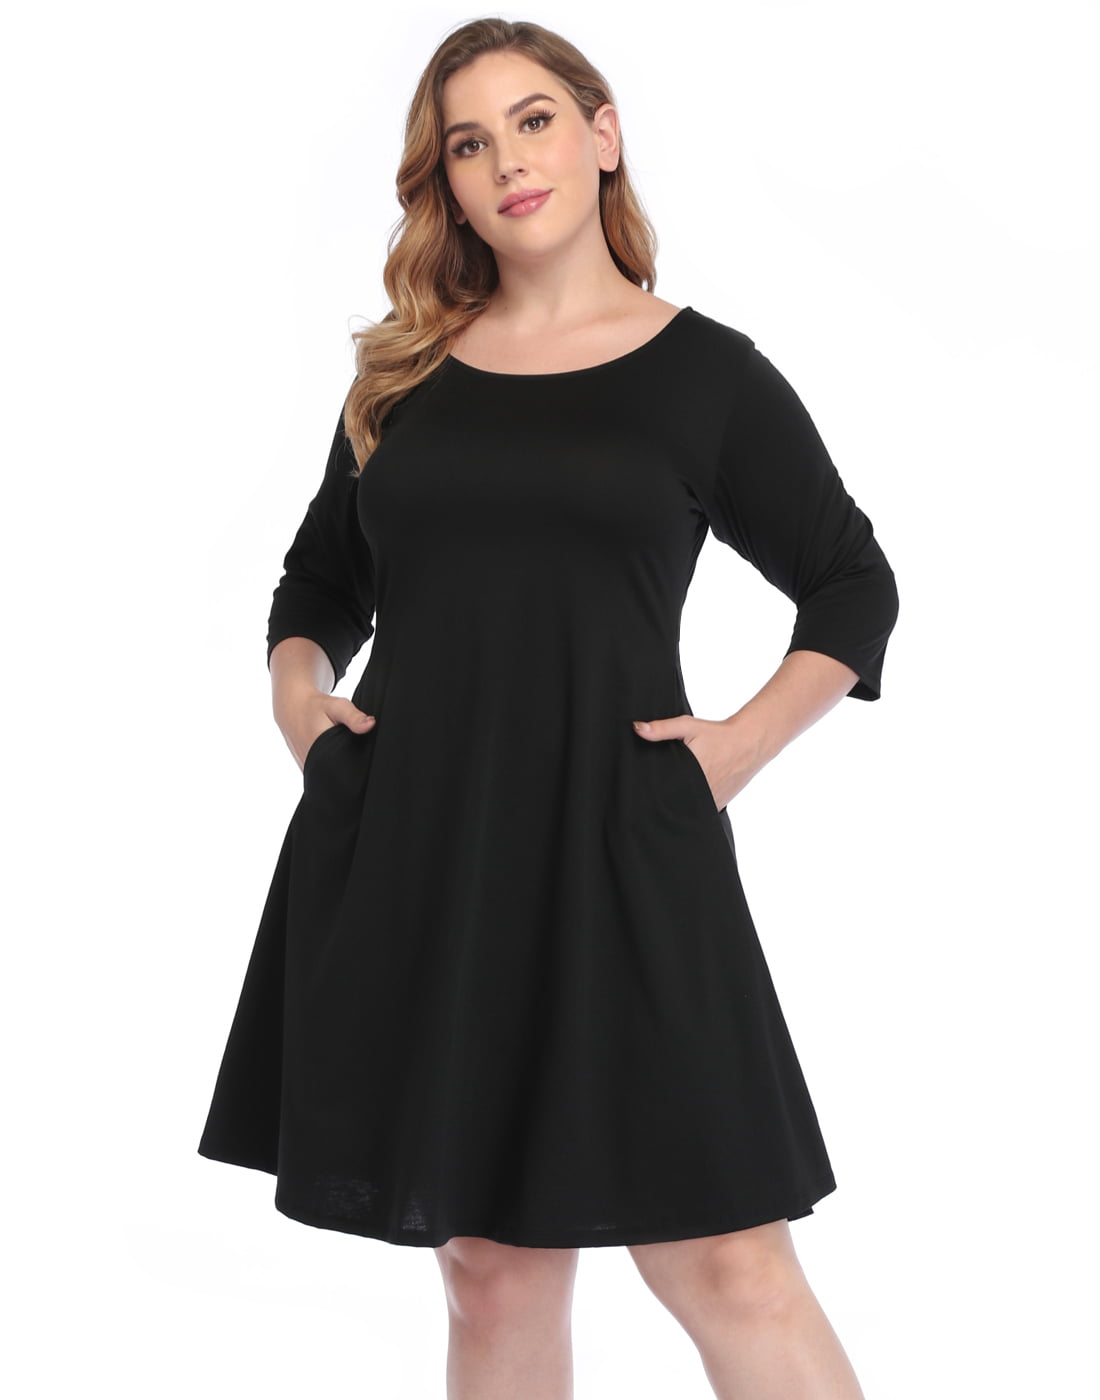
HDE Plus Size A Line Dress With Pockets 3/4 Sleeve Fit and Flare Skater Dresses (Black, 1X) - Walmart.com

HDE Plus Size A Line Dress With Pockets 3/4 Sleeve Fit and Flare Skater Dresses (Black, 1X) - Walmart.com
Image by walmart.com

Plus Size Dresses for Women | Fashion To Figure

Plus Size Dresses for Women | Fashion To Figure
Image by pinterest.com

PLUS SIZE FIT & FLARE FLOWING MAXI DRESS | ADDICTED2FASHION

PLUS SIZE FIT & FLARE FLOWING MAXI DRESS | ADDICTED2FASHION
Image by addicted2fashion.net

Unique Vintage Plus Size Black Spiderweb Endora Fit & Flare Dress - ShopperBoard

Unique Vintage Plus Size Black Spiderweb Endora Fit & Flare Dress - ShopperBoard
Image by ShopperBoard

Plus Size - Scuba Fit & Flare Mini Dress - Black - Torrid

Plus Size - Scuba Fit & Flare Mini Dress - Black - Torrid
Image by torrid.com

Wednesday, 24 December 2014

How to Decorate a Beach Themed Christmas Tree

How to Decorate a Beach Themed Christmas Tree

I use an indoor artificial palm tree as my Christmas tree. It is about 6 feet in height with a brown base, brown trunk and green "palms" coming off of the top. I decorate it with beach themed ornaments and it fits in with my theme.

I travel quite a bit so I try to pick up a beach themed souvenir ornament from each city I visit. This way not only am I bringing back a little something to remember my trip by, I can decorate my Christmas tree in a beach theme as well.

If you don't travel much to collect ornaments from different cities you can make them for really cheap. I have bought clear balls, poured beach sand and small shells in them and hung them on my tree. You can purchase starfish and sand dollars at your local craft store or online, drill a hole through them and stick raffia through the hole and hang them on your tree.


I recently purchased starfish garland from a local beach shop. I could have made it but it was so cheap it would have cost the same to make it. It is about a dozen smaller (approx 2") starfish that are on a string of raffia. I will hang this around my tree as garland. You could also make the same garland using seashells or sand dollars. A small drill and some raffia and you are set.

For lighting my tree, I wrap flip flop lights around the palms. Other choices that you could use are surfboard lights, blue lights, tropical shirt lights or palm tree shaped lights.

I will go to the fabric store and purchase some kind of tropical fabric to wrap around the bottom for a tree skirt. Sometimes finding tropical Christmas fabric is a little hard to find in a local craft store so I would recommend using Ebay. They always have many choices and it is inexpensive as well.