Just for Fun
How to Wear a Backless Dress

How to Wear a Backless Dress

Backless dresses are an elegant, striking look for anyone looking to make a statement by showing some skin. They can be a great choice for formal and semi-formal events, but many avoid them because they can be intimidating to wear. However, if you pick the right undergarments, take good care of your skin, and accessorize properly, you can feel comfortable and beautiful in a backless dress at your next big occasion.

When you're wearing a backless or low back dress, a regular bra just won't cut it — that's an absolute fashion fact. I know that fashion rules are often made to be broken, but you don't want to be caught with an unsightly bra band going across your back, or a clasp peeking between your cleavage. So, to pull off that back cut-out dress, you're going to need to purchase a new bra solution to go along with your outfit.

Luckily, there are many solutions that don't include straps, clasps or thick bands. Since different breast sizes require different levels of support, be sure to experiment with the one that works best for you... before your big night, of course!

Choosing Undergarments


Try a low-back bra if you need more support.


These bras have a band that wraps around your stomach and lower back, providing your chest with an ample amount of support while remaining hidden beneath your dress. If you have a larger bust, this is the choice you should consider first.

Cover up with stick-on silicone gel petals if you need less support.


If your bust is smaller, you might be able to get away without wearing any support. However, if you choose to go braless, you can risk exposing yourself through thin or light-colored fabric. Avoid this by sticking specialized gel petals over your nipples.

Choosing Accessories


Choose minimal, elegant jewelry to counterbalance your daring dress.


Accessories are an important part of any outfit, but the primary purpose of a backless dress is to show off your back. Jewelry that’s prominent or flashy can draw attention away from the true focus of your look.

Pick a pair of shoes that complements your dress without distracting from it.


People usually wear backless dresses to more formal occasions or events. As such, it’s usually appropriate to choose a fancy pair of evening shoes – usually heels – to go with your dress. Just make sure that your footwear doesn’t steal the spotlight from your gown.

Avoid accessories, such as scarves, that cover your neck or back.


Again, you want your back to be the focal point of your look. Necklaces can also create a disruption by drawing the eye to a clasp or an adjustable chain instead of your back.

For Hairstyles


Try a half-up, half-down hairstyle for a demure, mysterious look.


If updos aren’t your thing, try keeping your hair partially down. Allow part of it drape down your back, but make sure that enough of your skin still shows through. Covering up slightly can heighten the attractiveness of a backless dress.

Pin up your hair to highlight the style of your dress.


You may have long, luxurious locks, but if they cover your entire back, there is not much point in wearing a backless dress. Choose a hairdo that sweeps your hair up and away in order to show off your back.

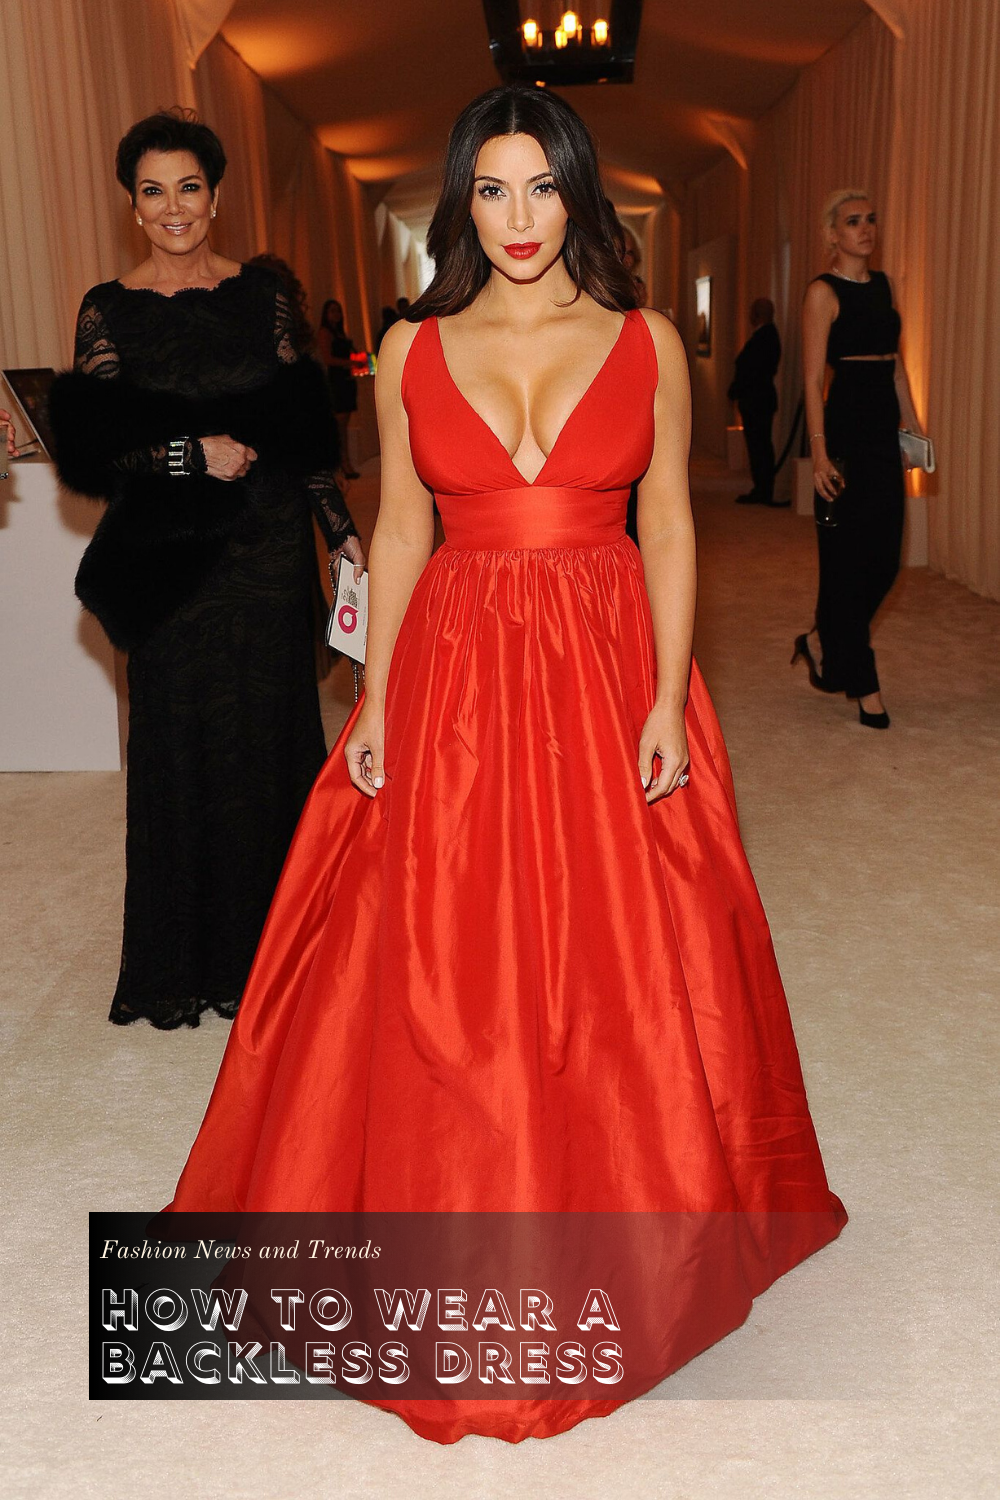
Celebrity in Backless Dress


Polka Dot Outfits For Women

Polka Dot Outfits For Women

If you want to try something special, then I am here to help you out. In today’s article, we are about to see my favorite classy polka dot outfit ideas that will drive you crazy. Believe me, every single polka dot outfit showcased in this compilation will bring everyone’s attention to you this year.

Polka dots are one of the trendiest prints ever irrespective of season and time. These have been dominating the fashion world since 1950’s. The retro appeal associated with it makes it special. Not just the vintage vibe, polka dots can be channeled to get a fashion forward look as well.

I have often seen girls feeling hesitated about wearing it. Why? Managing a proportional look is very important. If you don’t do that, you may end up on having a cheesy look. Here we have compiled different ways and techniques to wear polka dots. All of these methods make sure that you get a look that is chic, classy and easy on eyes.

A polka dot midi dress requires little-to-no styling, which is why it is summer after summer such a hero purchase. However, there are many more adventurous ways you can incorporate the print into your wardrobe in 2020. This year, many designers are splicing two or more spotty prints together created prints using more than one polka.

Scroll through our gallery of the best new ways to style polka dot


Dos and Don'ts of Polka Dots


Do…

  1. … wear them with other size polka dots.
  2. … pair them with stripes, plaid, or florals.
  3. … rock them on not only your apparel, but also your shoes, bags, or accessories.
  4. … dress them up with heels or down with sneakers.
  5. … pull them out for work or a weekend brunch with friends.

Don’t…

  • … wear too many polka dots at once – i.e. no more than three different pieces of your outfit. And only try mixing three different polka dots.
HOMEMADE BUTTERMILK BREAD RECIPE

HOMEMADE BUTTERMILK BREAD RECIPE

Buttermilk Bread baked fresh in your kitchen with this easy recipe! Buttermilk Bread is soft and has incredible flavor. Simple bread recipe that everyone loves.


Ingredients

  • 1 1/2 cups buttermilk*
  • 2 TBSP melted butter
  • 2 TBSP sugar
  • 1 tsp salt
  • 3 1/2 cups all-purpose or bread flour
  • 1 TBSP yeast

Instructions

  1. Combine buttermilk, butter, and sugar in a mixing bowl. In a separate bowl, combine dry ingredients, including yeast. Whisk dry ingredients together to combine, then add to buttermilk mixture in the mixing bowl. (I use a Kitchenaid Mixer.) Mix ingredients until well combined. I like about a quarter sized amount of dough to be sticking on the very bottom. If your dough looks a bit dry, add in another splash of buttermilk. Once you've achieved a good consistency, mix the dough on low for about 6-7 minutes. (Or knead by hand about 10 minutes.) Proper kneading is critical to great textured homemade bread!
  2. Once dough is done kneading, cover and let rise in a warm place for about 1 hour; until dough has doubled in size.
  3. Punch dough down and knead several times. Shape dough (I like to roll mine, then tuck the ends under) and place in a greased bread loaf pan. Place dough back in the warm spot and let it rise for another 30-45 minutes.
  4. Preheat the oven to 350 degrees F. Bake dough for about 30-35 minutes- until top is golden brown. Let cool and slice.
You can substitute regular milk + lemon juice for buttermilk, but you won't quite get the full texture and flavor of this bread. So add buttermilk to the grocery list; you'll love it!
You can make this recipe in a bread machine! No changes needed either. Add the ingredients to your bread machine pan in the order listed above. Before you add in the yeast, make a small well in the flour and place it there. I used the Basic White Bread setting with a light crust.
Blueberry French Toast Boat Recipe

Blueberry French Toast Boat Recipe

Ingredients (for 5 servings)

  • 4 oz cream cheese (110 g), softened
  • ¼ cup sugar (50 g)
  • 1 teaspoon cinnamon
  • 4 eggs
  • ½ cup heavy cream (120 mL)
  • 14 oz french bread (395 g), 1 loaf
  • 1 cup blueberry (100 g)
  • maple syrup, to dip

Preparation

  1. In a bowl, combine softened cream cheese, sugar, and cinnamon.
  2. Add eggs and heavy cream and whisk until well combined. Set aside.
  3. Preheat oven to 400˚F (200˚C).
  4. Cut a rectangle along the top of the loaf of french bread and pull out the part you cut along with the soft inside of the loaf. Set the “bread boat” aside.
  5. Tear apart the rectangle and soft inside of the bread that you removed into little bite-size pieces.
  6. Gently, fold the bread pieces and blueberries into the egg mixture until all of the liquid is absorbed.
  7. Place the “bread boat” on a baking sheet lined with parchment paper and pour in the bread and egg mixture.
  8. Bake for 30-40 minutes or until the top is golden brown. If the top is browning too quickly, cover the top of the boat in foil for the remaining time.
  9. Let cool before cutting into slices and serve with maple syrup.
  10. Enjoy!
Ham And Cheese Pull Apart Garlic Bread Recipe

Ham And Cheese Pull Apart Garlic Bread Recipe

Ingredients (for 15 servings)

  • 24 oz pizza dough (680 g)
  • 1 cup butter (230 g), softened
  • 6 cloves garlic, minced
  • 6 tablespoons fresh parsley, chopped
  • 1 teaspoon salt
  • 3 cups shredded mozzarella cheese (300 g)
  • 3 cups shredded cheddar cheese (300 g)
  • 10 slices deli ham, halved

Preparation

  1. Preheat the oven to 400°F (200°C).
  2. Roll out the pizza dough into an 18x10-inch (45x25-cm) rectangle.
  3. In a medium bowl, combine the butter, garlic, parsley, and salt. Use a spatula to spread in an even layer over the dough.
  4. Sprinkle a generous handful of mozzarella and cheddar cheese in a square checkerboard pattern across the dough, making 20 squares.
  5. Place a piece of ham over each section of cheese.
  6. Cut the dough into 20 evenly sized squares and stack four on top of each other, alternating cheeses as you go. There will be five stacks of four.
  7. Place stacks in an 8 ½ x 4 ½-inch (21 x 11-cm) loaf pan.
  8. Bake for 35 minutes, until golden brown.
  9. Enjoy!
Cheesy Garlic Bread Meatball Ring Recipe

Cheesy Garlic Bread Meatball Ring Recipe

Ingredients (for 8 servings)

  • 1 lb ground beef (455 g)
  • 1 egg
  • ¼ cup bread crumbs (30 g)
  • 4 tablespoons Chopped fresh parsley, divided
  • ½ tablespoon salt
  • ½ tablespoon pepper
  • 1 batch pizza dough
  • 1 cup marinara sauce (260 g), plus more for serving
  • 1 cup shredded mozzarella cheese (100 g)
  • ¼ cup butter, melted
  • 2 cloves garlic, minced
  • 2 tablespoons grated parmesan cheese

Preparation

  1. In a medium bowl, combine the ground beef, egg, bread crumbs, 2 tablespoons of parsley, salt, and pepper. Mix well.
  2. Pinch off a ball of the mixture, roll between your hands to make ping pong ball-sized meatball. Repeat with the rest of the meat.
  3. In a large pan, cook the meatballs over medium heat, turning to brown each side. Remove from heat and drain on a paper towel.
  4. Preheat oven to 350°F (180˚C).
  5. Pinch off a portion of pizza dough and, with your hands or a rolling pin, flatten out and top with a tablespoon of marinara sauce and mozzarella cheese. Add a meatball and wrap the dough over, pinching at the seams to close. Repeat with the remaining ingredients.
  6. Arrange the balls in a circle, seam-side down, in a large cast-iron skillet.
  7. Mix the melted butter with the garlic, remaining 2 tablespoons of parsley, and the Parmesan. Brush the balls with the garlic butter mixture.
  8. Bake for 20 minutes, or until golden brown. Let cool for 5-10 minutes.
  9. Place a bowl of warm marinara sauce in the middle of the skillet, then serve.
  10. Enjoy!
Cheese Garlic Bread Recipe

Cheese Garlic Bread Recipe

Ingredients (for 4 servings)

  • 1 stick butter, 1 stick, softened
  • 4 cloves garlic, minced
  • ⅓ cup parmesan cheese (35 g)
  • ⅓ cup shredded monterey jack cheese (35 g)
  • ⅓ cup shredded cheddar cheese (35 g)
  • ⅓ cup fresh green onion (50 g), sliced
  • 1 baguette, 8 inch (20 cm)

Preparation

  1. Preheat oven to 400°F (200°C).
  2. In a bowl, combine all of the ingredients except the baguette, and mix until smooth.
  3. Slice the baguette in half lengthwise, then spread the butter mixture evenly on both sides of the baguette.
  4. Place on a tray lined with parchment paper and bake for about 15 minutes, until cheese is bubbly and starting to brown on the edges.
  5. Slice, cool, then serve.
  6. Enjoy!
Cheesy Bacon Monkey Bread Recipe

Cheesy Bacon Monkey Bread Recipe

Ingredients (for 18 servings)

  • 7 strips bacon
  • 2 cups shredded cheddar cheese (200 g)
  • 2 cups shredded mozzarella cheese (200 g)
  • 10 oz flaky biscuit dough (290 g), 3 cans
  • 1 ¼ cups butter (290 g), melted
  • 2 cloves garlic, crushed
  • 2 teaspoons italian seasoning
  • parsley & minced optional

Preparation

  1. Preheat oven to 350°F (180°C).
  2. Crisp bacon over medium heat. Allow it to cool, then crumble.
  3. Generously grease a large bundt pan with cooking spray.
  4. In a bowl, mix both kinds of cheese.
  5. Cut each biscuit into four pieces. Flatten each piece in the palm of your hand and add a pinch of the mixed cheeses and crumbled bacon. Gather the edges and pinch the biscuit into a ball.
  6. In a small bowl, mix melted butter, Italian seasoning, and garlic.
  7. Drop the biscuit pieces in the butter mixture and place in the bundt pan.
  8. Bake 30-35 minutes or until golden-brown. (Be careful - the butter may begin to smoke toward the end of the bake time. If it begins to smoke, remove from the oven.)
  9. Let stand for five minutes, then place a heatproof plate on top of the pan. Using a pot holder, flip the pan and plate over and invert onto your serving plate. Be careful as the pan will still be hot.
  10. Sprinkle with parsley.
  11. Enjoy!
BBQ Popcorn Breaded Chicken Recipe

BBQ Popcorn Breaded Chicken Recipe

Ingredients (for 4 servings)

  • 2 boneless, skinless chicken breasts
  • 1 tablespoon hot sauce
  • 1 tablespoon BBQ sauce, and extra to serve
  • 1 tablespoon peri-peri sauce
  • 1 tablespoon lemon juice
  • 1 tablespoon smoked paprika
  • 1 tablespoon chili powder
  • 1 tablespoon brown sugar
  • 2 tablespoons bbq seasoning, divided
  • 3 tablespoons coconut oil
  • ⅓ cup yellow popcorn kernals (40 g)
  • 1 tablespoon melted butter
  • 1 can bbq chips

Preparation

  1. Wash and drain the chicken breasts.
  2. In a medium bowl, mix the hot sauce, BBQ sauce, peri-peri sauce, and lemon juice.
  3. In a separate bowl of the same size, mix the smoked paprika, chili powder, brown sugar and half of the BBQ seasoning.
  4. Drizzle the wet mixture on the chicken breasts, making sure to get both sides.
  5. Sprinkle the dry mixture on the chicken breasts, making sure to get both sides.
  6. Marinate the chicken breasts in the fridge for 4 hours.
  7. After 4 hours or so, preheat the oven to 425°F (220°C).
  8. Put a large saucepan over medium-high heat. Melt the coconut oil in the saucepan. Put 3 or 4 kernels of popcorn in the saucepan. Once they pop, add the rest of kernels, put on the lid and take off the heat. After 30 seconds or so, place back onto the stovetop. Shake often. Once the popping reduces to every 4 seconds, remove from heat.
  9. Pour the melted butter on the popcorn, stirring to get all of the popcorn. Add the rest of the BBQ seasoning, stirring to get all of the popcorn.
  10. Grind ⅔ of the popcorn along with the BBQ chips. Sprinkle this over the marinated chicken breasts, making sure to get both sides. The marinade should adhere the popcorn crumbs.
  11. Bake the chicken for 18-20 minutes. Once ready, serve with the rest of the popcorn and the BBQ sauce.
  12. Enjoy!

Coloring

[Coloring][recentbylabel]

Culture

[Culture][recentbylabel]
Notification
This is just an example, you can fill it later with your own note.
Done