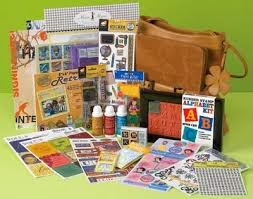
Just for Fun: Scrapbook
Showing posts with label Scrapbook. Show all posts
Scrapbooking Techniques

Scrapbooking Techniques


http://just4funwithsandy.blogspot.com/2013/08/scrapbooking-techniques.html

There are 3 common Scrapbooking Techniques that usually used.
 
Journaling

Handwritten or printed journaling -- the art of telling a story in print -- separates scrapbooks from photo albums. As you plan journaling for a scrapbook page, keep these tips in mind:

  • Try to let your journaling connect the page viewer with the actual event. Record more than just titles, dates, and names. Describe your reactions to what was happening, tell what the subject was doing, and why, share how you feel when you look at the photos, or point out what you notice now that you didn't when the photo was taken.
  • Let someone else proofread a draft of your journaling before you add it to the page. Check for spelling and grammatical errors, or use the tools in your word processing program.
  • Practice hand-journaling to perfect your penmanship. Try writing your text in pencil before going over it in pen. Also experiment with different styles of script and a variety of writing instruments.
  • Use computer type to record large amounts of journaling or create custom page titles.Try recording your journaling in shapes such as circles or hearts, or in a wavy or diagonal line for variety and interest. 

Cropping

Cropping involves a variety of techniques and tools. Make multiple prints or photocopies before cropping your photos, and crop only small areas at a time. Don't crop Polaroids -- the chemicals in the paper will damage your photos.

There's not one right way to crop. You can use a craft knife and ruler to trim off a portion of the photo and retain its square or rectangular shape. Or use a pair of small sharp scissors to silhouette and image, cutting away the background. You can also use circle cutters and templates to create interesting photo shapes or simply crop the photo freehand. Here are some tips:

  • Carefully compose your photos in the camera viewfinder before shooting to avoid excessive cropping later.
  • Let the natural composition of your photo determine the final cropping. For example, a wide group of people will appear better cropped as a horizontal oval than as a circle.
  • Let the photo remain the focus. Don't let elaborate cropping detract from the subject.

Matting

Use matting to make your photos, journaling, and memorabilia stand out on the page. Coordinate matting colors and textures with your photographs and memorabilia rather than detract from the subjects. Use a solid-color mat to blend in with the layout or a patterned mat to stand out.

To create a simple photo mat, use a background paper or card stock that's slightly larger than your photo. Position the photo on the mat, and adhere it with archival-quality adhesive. Then trim the mat with straight- or decorative-edge scissors, a craft knife, or a paper trimmer.
9 Tips for Creating a Great Scrapbook Album

9 Tips for Creating a Great Scrapbook Album


http://just4funwithsandy.blogspot.com/2013/08/9-tips-for-creating-great-scrapbook.html

Tips for Creating a Great Scrapbook Album

1. Identify as many people in your photos as possible, and add specific places and dates whenever possible. Ask other and older family members for help in identification. Family get together are very useful for soliciting this type of help.

2. Be sure to wash your hands before handling old photos. The dirt and oils from your skin could damage them. The same is true for handling photo negatives.

3. Since all of the elements in your album should be acid-free, it only makes sense that you store your supplies in archival quality boxes and envelopes. You'll find these at most stores that carry scrapbook, photography, or stationery supplies.

4. Create an interesting composition by placing photos of different shapes and sizes together on the scrapbook page. Back some photos with colored papers cut out with decorative-edge scissors. Leave others unframed.

5. Use your heirloom photos in your album or make color photocopies of them. If you decide to use the original photos, consider securing them to the scrapbook pages with photo corners, instead of permanently adhering them.

6. To capture all the shading, make color photocopies of your black-and-white or sepia-toned photos, rather than making black-and-white photocopies.

7. Your heritage album will be an easier "read" if you title the pages (or sections). It's easily done with a family member's name written in a calligraphy pen and framed like the photos.

8. Include small mementos on your pages -- newspaper clippings, old letters, awards, certificates, ribbons, calling cards, or a lock of hair. These items add interest to the pages -- and to your family's history.

9. When recording the information in your family album, use your own handwriting. The warmth of penned notes and labels will give your album a personal touch that can't be generated with computer lettering.
How to Place Your Pictures in Scrapbook

How to Place Your Pictures in Scrapbook

Deciding how to display your collected photos can be the hardest part of creating a scrapbook page. Here are some ideas to get you started creating a scrapbook.

Use Copies, Not Photos!

http://just4funwithsandy.blogspot.com/2013/08/how-to-place-your-pictures-in-scrapbook.html
Photocopies of photographs allow you to play with the sizes and shapes of the images: enlarge some areas and cut them into silhouettes; shrink others to fit inside stamped frames; or trim away uninteresting portions of backgrounds to make unusual shapes. Plus, photocopies allow some creative room to work with color Polaroid photos. Black-and white Polaroid photos can be cropped, but color Polaroids will separate into thin layers.

When making photocopies of your photos -- color, sepia-tone, or black-and-white -- do it on a color photocopier. The detailing in the black-and-white photo is all but lost when copied on a black and white photocopier. The middle tones go very light or very dark, and you lose all the fine detailing. See how much more closely the color copy, right center, resembles the original, while the black-and-white copy appears muddy.

Cropping: Think twice, cut once!

With a few well-placed snips of your scissors, you can make your photos dance, jump, and sail off the page. Creative cropping can strengthen a picture's impact by eliminating unwanted backgrounds and spotlighting the primary subject.

Before you crop your photo, play with the page layout. Start by making several copies of your snapshots on a black-and-white photocopier. Cut the photocopies in a variety of shapes, then experiment with different ways to position and use them on the page.

When cropping a photo, be careful not to cut away important bits of history. An old family car, portions of clothing, or a piece of furniture in the background could prove sentimentally invaluable in the years to come.

Tips for Taking Great Photos

Great photographs make great scrapbooks. Carry your camera everywhere and keep these simple guidelines in mind whenever you want to capture a memory:

1. Be generous with your film. Opportunities will present themselves just once, and the price of film is very minor when compared to the cost of a once-in-a-lifetime shot or experience.

2. Capture the unposed or unscripted moment. The best shots are un-rehearsed and capture the personality of the subjects.

3. Write It Down. Keep a small notebook with you so you can write down names, places, dates, and any other pertinent information about the people and the places you photograph.

4. Get up Close and Personal. Try to position the camera no more than 8 feet from the subject.

5. Set the Scene. Take one shot of the people, and then take a second shot of the background in order to set the mood.

6. Use Light to Your Advantage. Have your subject face the sun, or keep the sun behind your own shoulder. Early morning and late afternoon on a sunny day are ideal times for taking pictures; bright noonday sun creates harsh shadows and makes people squint their eyes. Gray days produce grainy photos.

7. Create an eye-catching composition. Rather than place your subject directly in the center of the photo, adjust your frame so the subject is about one-third of the way from the edge. The same rule applies when shooting a still life or landscape.
Scrapbooking Materials

Scrapbooking Materials


Albums

http://just4funwithsandy.blogspot.com/2013/08/scrapbooking-materials.htmlPhoto-friendly, acid-free albums are available in standard 8-1/2 x 11-inch, 12 x 12-inch, and 5 x 7-inch sizes. Most will let you insert plastic page protectors. The most popular types of scrapbooking albums are:

Three-ring: These familiar favorites have rings that snap apart for easy page insertion and removal.

Spiral-Bound: Albums with this type of wire binding have permanently attached pages and are ideal for one-topic and themed scrapbooks.

Strap-style: Albums that use plastic straps allow the pages to lie completely flat when the album is opened.

Adhesives

There are lots of different scrapbooking adhesives available, but some will work better than others for particular applications. You can choose from adhesives that set up instantly as well as repositionable adhesives that let you safely lift and rearrange elements (wet bonds usually are permanent while dry bonds usually are repositionable). Here are the most popular types of adhesives and the applications where each works best:

Double-sided tape and dots: Usually sold in plastic dispensers, and is available in both permanent and repositional adhesives. Adhesive dots are great for adhering smaller items to layouts and also are available in permanent and repositional forms.

Photo corners and sleeves: Photo corners with a peel-away backing come in sheets and rolls and in a variety of colors. Photo sleeves are made of clear plastic and have adhesive backing; they simply slip over your photos. Corners are ideal for attaching photos directly to layouts; sleeves work best for displaying photos that you may want to change later.

Spray Adhesives: Aerosol spray adhesives provide an even layer of glue that can cover large surfaces quickly. Sprays work well for adhering background papers or photo mats, and the dried adhesive won't show through transparent papers, such as vellum. Use spray adhesives only in well-ventilated areas and away from flames; never let children use them without adult supervision.

Liquid Adhesives: These come in a bottle, stick, pen, and wand applicators, and with thick or thin tips. The adhesive itself may be permanent or repositionable and fast- or slow-drying. Liquid adhesives work best for attaching small items such as punches or die-cut letters, or for tacking down dimensional items such as beads and buttons.

Adhesive Tabs: White and transparent double-sided adhesive tabs come in roll form and in refillable dispensers. They're great for adhering both small and large items with minimal mess.

Adhesive Foam: Use double-sided adhesive foam, dots, squares, and roll tape to secure items to your page and add dimension at the same time. They'll life die cuts, letters, and cropped photos up to a 1/2-inch from the page surface.

Embellishments

Use embellishments to personalize and enhance your scrapbook pages by highlighting photos, drawing attention to journaling, or helping to set a theme. Although nearly anything can work as an embellishment, these three are amongst the most popular:

Punches: Available in a variety of shapes and sizes, decorative paper punches let you create custom accents by punching shapes from whatever papers complement your layout.

Die Cuts: These premade paper shapes are available at most scrapbook and crafts stores and come in many shapes, sizes and colors. For a fee, some stores will let you use their die-cutting machine with your own papers to creat shapes and perfectly coordinate with your layout.

Stickers: Acid-free, photo-safe stickers come in thousands of different themes and sizes and are widely available in sheets and rolls.

Pens and Pencils

Lots of different writing utensils are safe to use on scrapbook pages, but look especially for those labeled "acid-free" or "photo-safe." Also choose products that will resist bleeding and fading. All come in a plethora of colors and sizes.

Gel Pens: These medium-line pens are ideal for journaling or outlining letters and embellishments, and they just come in just about every color imaginable.

Colored Pencils: Available in hundreds of hues, colored pencils are a scrapbooker's staple, ideal for shading and adding highlights to lettering and creating embellishments. Use them with a blender -- a clear, colorless pencil or pen -- to smooth and soften your colors.

Felt-tip Markers: Besides giving you a range of color choices, felt-tip markers also come in several different tip styles. Here are the four most common tips you'll find:

Chisel Point: This versatile marker has a tip with both broad and narrow edges and can produce distinctive decorative lettering and designs.

Monoline: These all-purpose pens have tips that range from very fine to thick (usually specified in millimeters). The round, tapered nibs can be used to create smooth lines for basic lettering techniques, captions, borders, line art, and illustrations, as well as to add details to letters made with other types of markers.

Scroll Point: This notched-tip marker produces a double line with just a single stroke. Use it to make basic block letters, design detailed borders, or draw straight double lines.

Brush Point: This marker has a flexible paintbrush-style tip, which is useful for adding ink to rubber stamps and for filling in shapes and letters.

Templates

Take advantage of many shapes and sizes of plastic templates to crop your photos, create embellishments and do dry embossing. Lettering templates also come in a range of sizes and type styles.

Scissors and Other Cutting Tools

Most cutting implements you'll find for sale will work fine for scrapbooking. Here are a few of the handiest and how best to use them.

Scissors: They come in straight- and decorative-edge styles. Long straight=edge scissors are useful for cutting large sheets of card stockand paper for freehand cropping photos. Small scissors work best for cutting out detailed embellishments. Decorative-edge scissors are ideal for cutting photo mats or anything to which you'd like to give a dressier look.

Crafts and Swivel Knives: Craft knives are perfect for making straight cuts on paper and card stock and for cropping photos. Swivel knives are similar to craft knives, but their rotating blade makes them better for cutting along curves or cutting out letters and template shapes. use these sharp tools with a self-healing or glass cutting mat.

Rotary Cutters: Often used to cut fabric, rotary cutters are also handy for cutting large sheets of paper and card stock or trimming photos. Use these tools with self-healing or glass cutting mats.

Paper Trimmers: This tool is handy for making square cuts and straight edges. The larger sizes are capable of handling even oversize sheets of paper and card stock.
Scrapbook Supplies

Scrapbook Supplies

http://just4funwithsandy.blogspot.com/2013/08/scrapbook-supplies.html
Since the purpose of compiling a scrapbook is to preserve memories, start with supplies that protect your precious photographs and memorabilia. Choose archival supplies; acid-free and lignin-free paper; acid-free or pH-neutral adhesives; and permanent, fade-resistant inks and pen.

The basics of scrapbooking include an album, adhesive, a pair of scissors, and a journaling pen. With your own photos, you can create pages using just these four items.

Choose a photo album that contains acid-free pages, or purchase acid-free sheet protectors and slip them into a three-ring binder. Be sure the sheet protectors are PVC-free (polyvinyl chloride-free), or chemically stable; look on the packaging for a "photo-safe" or "archival" notation.

Adhesives to secure everything to the album pages come in many forms, including photo tape, photo corners, double-sided adhesive dots, squares or strips, glue pens, glue sticks, non-permanent glue, and bottled glues. Like all of the materials used for your album, the adhesives must be acid-free.

Optional supplies to enhance your scrapbook, mat your photos, and create interesting backgrounds include colored and patterned acid-free papers. Acid-free permanent markers and pens assist you with decorative writing and are fun for adding doodles to your scrapbook pages. Use straight-edge or decorative-edge scissors to cut your photos into interesting shapes and crop out any unwanted areas.

Other supplies you may want to consider are stickers, a paper trimmer, templates, decorative rulers, paper punches, rolling ball glue pen, rubber stamps, computer clipart, circle cutter, idea books, and of course, magazines like Scrapbooks Etc.

Since all of the elements in your album should be acid-free, it only makes sense that you store your supplies in high quality boxes and envelopes. You'll find these and all the above supplies at most stores that carry scrapbook, photography, craft or stationery supplies.
How To Create Your Own Scrapbook

How To Create Your Own Scrapbook


How To Create Your Own Scrapbook

Creating a scrapbook is a great way to record your family's most precious memories -- including summers, vacations, special birthdays and graduations. Photos are the heart of most scrapbooks. Below are some tips on how to gather these and handle them safely, as well as ideas on other kinds of keepsakes you might want to include in your own scrapbook.

Using Photos

Gather as many photographs as possible. Sort them so they relate to one another and to the album's theme. You can affix the original photos in your album. However, if you want to save them for other purposes, make copies of the originals on a color photocopier.

Remember your collection of slides and reel-to-reel 8mm films. These can be converted to photographs at a relatively low cost. Check you local photography supply shops and photo studios.

Handling Older Photos

Be sure to wash your hands before handling your old photos. The dirt and oils from your skin could damage them. The same is true for handling photo negatives.

A family photo that has yellowed, become brittle, or been affixed with tape should be moved to a safer environment. However, you may want to copy the photo before moving it or have it professionally photographed while it's still in its current site.

Use your heirloom photos in your album or make color photocopies of them. If you decide to use the original photos, consider securing them to the scrapbook pages with photo corners, instead of permanently adhering them.

Including Mementos

Collect everything! Save small items that relate to your theme -- old letters, awards, certificates, ribbons, calling cards, a lock of hair, menus, place mats, brochures, business cards, newspaper and magazine articles, programs, announcements, matchbooks, and food wrappers. These items add interest to the pages -- and to your family's history. Even objects from nature make interesting mementos. Use a pH tester pen to determine the acidity or alkalinity of such items.

Protect scrapbook pages by photocopying or by placing the item in a clear, self-adhesive, acid-free memorabilia pocket. They're available in several sizes with scrapbooking supplies.
Scrapbook and Welcome Card Basics

Scrapbook and Welcome Card Basics

Paper crafts are a popular pastime right now.  Scrapbooking is a fun way to display pictures and chronicle family history.  Other paper crafts include making greeting cards and even making hand made papers.

When getting started at paper crafts, it is easy to spend a lot of money!  Go easy at first until you know what sort of paper craft products you are likely to use.  For instance, you may find that you love using stickers in scrapbooks, but rarely use your rubber stamps.  If this is the case, you would be better off spending more on stickers and less on rubber stamps for your paper crafts.

Almost everyone has at least some of their photographs stored somewhere in a shoe box.  Scrapbooks are a great way to get those photos out where people can enjoy them.  You will need a loose leaf binder, some plastic page protectors, and some colored cardstock for starters.

Many paper crafts experts insist on only archival quality materials.  Check the labels as you buy.  Most paper products, even the cheaper ones, are labeled "acid-free," which means that it shouldn't fade or otherwise deteriorate if stored for a long time.  Sunlight will bleach almost anything, but your paper crafts should not be out in the sunlight very often.


To start a scrapbook you have several options.  You can select photos that all relate to one event, such as a trip or a child's participation in sports.  This type of scrapbook will be short, but can be designed around a theme.  This is a good choice if your photos are not in a jumble.  If they are, then you may wish to choose 3 or 4 photos around a general theme, and change the theme for each page.  You may want to include some 2 page spreads in your scrapbook.

Attach your photos to the cardstock with double-sided tape squares or a gluestick.  Then it's time to decorate the page with stickers, paper shapes, or rubber stamped designs.  In addition, you can use a colored gel pen to write dates, names, and other highlights about the activities in the pictures.

Other items are available in paper crafts stores.  These includes die cuts, which are pieces of paper already cut into shapes and objects.  There are also special scissors that cut paper with an interesting edge.  A pair of the type called "deckle" scissors is very useful for making elegant looking scrapbook pages, greeting cards, and other paper crafts.  If you also have an old pair of pinking shears that are too dull to cut fabric, you can use those for cutting out shapes and photos.

Many paper crafts enthusiasts begin with scrapbooking, but then branch out to making their own greeting cards.  Greeting cards may or may not have an original poem written on the inside.

A simple "Happy Birthday," "Get Well Soon," or even just "Hi!" is enough to brighten someone's day, so don't worry about not being a good enough writer to make your own greeting cards.  Rubber stamps often make beautiful greeting cards.

You can even attach small ribbons, beads, and other items to hand made cards.  A handmade card is sure to please anyone, whether they are interested in paper crafts or not.

Coloring

[Coloring][recentbylabel]

Culture

[Culture][recentbylabel]
Notification
This is just an example, you can fill it later with your own note.
Done