Just for Fun: Hobby
Showing posts with label Hobby. Show all posts
How to Make Cornhole Bags - Easy & Fun DIY Tutorial

How to Make Cornhole Bags - Easy & Fun DIY Tutorial

Have you ever played the game of cornhole? It's a lot of fun and catching. Making your own corn hole bags for the cornhole game is easy, fun and can save you a ton of cash. Check out this tutorial and learn how to make cornhole bags for yourself below.

Of course, you can easily buy some great cornhole bags online, but from time to time it’s fun to have a DIY project that your family and friends can enjoy! If you have a little time and the right equipment, making your own cornhole bags can be a fun challenge.

How to Play Cornhole Game?


Cornhole is a game that can be enjoyed by all. While it is easy to be acquainted with the game, it requires skill and technique to best your opponents. The game is adaptable. You can play it as a team or one on one. You can play it indoors or outdoors. All of these factors make it a super fun and timeless game.

You don’t need much to get started. All you need are a few cornhole bags and a cornhole board. Unlike other games, it doesn’t need special equipment. And now thanks to the guide above on how to make cornhole bags yourself, you can enjoy the game with home made equipment.

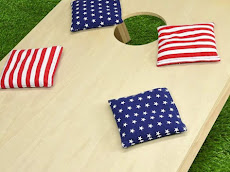
Players throw small bags at a board with a hole in it. Players earn points by sinking bags in the hole or landing bags on the board. A set of cornhole bags have a total of 8 bags per set, 4 each of 2 different colors.

The American Cornhole Association requires platforms be a 48" x 24" rectangle made from 1/2-inch plywood. The front of the platform stands 2-1/2 to 4 inches tall and the back of the platform sits 12 inches off the ground. The plans for this project follow those requirements.

Regulation corn bags need to be 6-inches square, made from duck canvas and be filled with two cups of corn feed.

Steps for How to Make Cornhole Bags


Cornhole bags are not made to last forever, but I have a secrets recipe to share with you that will help you get the most life and perfect play out of your bags.

Using the following instructions, you’ll be able to create regulation-size bags as set by the American Cornhole Organization.

To make a set of strong and sturdy cornhole bags, we used Cotton Duck material. It is a soft, easy-to-sew material and is strong enough to stand up to the abuse of being tossed around. The bags are sewn with a double stitch around the inner sides, according to the American Cornhole Organization’s regulations. For the stuffing inside, we used feed corn, which is traditional, but you can also use beans or plastic pellets. To have your bags regulation compliant, each bag should contain approximately 1-3/4 cup of corn to weigh between 15-16 oz.

Supplies


12 oz. duck canvas, 1/4 yard each of two colors
Quality feed corn, 15 oz. for each corn bag (or use 15 oz. dried beans)
Zipper foot
5-in-1 Sliding Gauge (optional)
Clover Point 2 Point Turner (optional)
Wonder Clips (optional)


Instructions


Step 1: Cut out sixteen 7-inch squares, 8 squares of each color.

Cut out 7” strips from two different colors of fabric with the help of a ruler and a rotary cutter. Then divide each strip into four 7” squares. You will need a total of sixteen 7” squares, 8 squares of each color. Spare about ½” of fabric on the edges for the ease of stitching.

For more precision, you should first cut out the 7”x7” on a cardboard to make a stencil. Then firmly place this stencil on the cloth, take a marker and start tracing. After measuring 8 squares, cut them out. Easy-peasy.

Step 2: Start sewing 3 sides ½ inch from the raw edges

Next up, take two pieces of fabric, line them up for sewing. Adjust your sewing machine for straight stitching at medium speed. Start sewing the sides ½ inch from the raw edges. Do a double stitching to prevent the bag from bursting while throwing around.

Fully stitch 3 sides and leave a small gap on the 4th side for filling the bag. Chop off the corners before flipping your bag inside out.

Step 3: Fill the Bag with 15 Oz of filling (Corn or Plastic)

After cutting the corners, turn the bag inside out. Use a pen or something to poke out the corners.

Next, measure 2 cups of whole corn or plastic pellets for stuffing. Use a digital scale to accurately measure out 15 Oz. of filling. Stick a wide funnel into the gap you left while stitching and start loading the corn. When done, seal the mouth with two pins as close to the edge as possible.

Step 4: Finally Stitch the open side

This is the final step of this process. This time, you will have to sew the thicker side which could be a little tricky for beginners.

Have patience, take your time and always put double stitching. Go for triple stitching if possible. Sew the entire length of the edges for a great finish. For best results, use zig-zag stitch for the final stitching if your machine has this option.

Now you're ready to get outside and throw some cornhole bags! The whole process should take at least an hour or two to cut and sew cornhole bags yourself depending on your sewing ability. Do you and your family and friends play cornhole or other yard games? What’s your favorite summertime game? Share your thoughts and stories with us in the comments!
Official Cornhole Bags Rules and Regulations

Official Cornhole Bags Rules and Regulations

Cornhole is a very simple and fun game. Toss the bag through the hole.  But when you dig a little deeper, there are an abundance of rules and regulations. If you want to be official and have regulation cornhole bags, you need to take the following things according to American Cornhole Association (ACA) into consideration.

Cornhole, also known as bean bags, baggo, bags, or sack toss, is a common lawn game where players (singles or teams of two) throw bean bags at a hole on an angled board to score points. Players score three points for throwing a bag through the hole, and one point for each that lands on the platform.

Modern cornhole was invented in 1883 as a game called 'Parlor Quoits' that substituted horseshoes with bean-bags so that the game could be played indoors. Variety of venues that typically include backyards, bars, breweries, camp sites, and tailgating events. Cornhole has gained popularity for a variety of reasons that may include the simplicity of the game rules, the social nature of competing in teams or watching others play, and the ease of transporting the required game equipment.

Regulation cornhole bags need to be 6-inches square and should weigh between 14-16 oz. Today are typically filled with plastic pellets, but traditional cornhole bags filled with corn kernels are still popularly used. Its name because the bags used to play the game were originally filled with corn kernels.

Lets go to the Regulation And Rules

CORNHOLE GAME COURT LAYOUT


DIMENSIONS
A cornhole court shall be a level rectangular area 8-10 feet wide and a minimum of 40-45 feet long. The court should consist of two cornhole boards, designated pitcher’s boxes, and foul lines.

PITCHER'S BOX
The pitcher’s box is the rectangle 4 feet by 3 feet at each end of the court, parallel with, and on both sides of the boards. Each player must remain in the pitcher’s box while pitching a cornhole bag.

FOUL LINES
There are two sets of foul lines: open adult-play and junior-play for children 12 and under. The adult foul lines shall be defined as an imaginary line 27 feet between the front of each board. The junior-play foul lines are defined as an imaginary line 12-15 feet between the front of each board. The foul line should be parallel to the front of the opposite board to meet ACA guidelines.

STANDARDS REGULATIONS FOR CORNHOLE BOARDS AND BAGS


The ACA has adopted the following equipment specifications and standards:

1. Each board shall be a 47.5 to 48 inch by 23.5 to 24 inch rectangle made of plywood that is at least a 0.5 inch thick. ACA sanctioned cornhole tournaments should only be played with wooden boards, as there is significant variance in play between wooden, plastic, and other surfaces.

2. The hole in the board shall be 6 inches in diameter. Its center shall be 9 inches from the top and 12 inches from each side of the board edges.

3. The front of the board shall be 3-4 inches from bottom to top.

4. The back of the board shall be approximately 12 inches from ground to the highest point of the deck.

5. The board finish shall be sanded to a very smooth texture, and there shall not be any blemishes in the wood surface that might disrupt or distort play.

6. The board can be painted with a semi-gloss exterior latex paint resulting in a surface that allows bags to slide, but is not so slippery that it allows the bags to slide back down the board.

7. The cornhole bags shall be made from two fabric squares 6.25 square inches with a 0.25 inch stitched seam on all four sides. Bags should be made from durable fabric. Each bag shall be filled with approximately 2 cups of feed corn and finished bags should be roughly 6 square inches and weigh 14-16 ounces. ACA will allow the use of plastic pellets (All Weather Cornhole Bags) in lieu of feed corn. ACA offers both Corn-Filled and All Weather cornhole bags.

THE CORNHOLE GAME RULES


Every cornhole match is broken down into innings of play. During an inning of play, each player must pitch all four of his/her bags. An inning is never completed until all players pitch all four of his/her bags.

The cornhole game shall be played to the predetermined number of twenty-one points. The first player/team to reach (or exceed) that amount at the conclusion of an inning is the winner.

Singles Play - Player A competes against Player B.

1. Both players stay in their designated lane for the whole game.
2. Players start the game at the headboard and will alternate pitching bags until each player has pitched all four of his/her bags.
3. Players then walk to the end of their lane to the other court, take score, and resume pitching back to the other board.
4. The top of an inning is completed when the first player pitches all four bags; the bottom of the inning is completed when the remaining player pitches all four bags.

Doubles Play - Team A competes against Team B; each team is comprised of two people.

1. Each team will stay in their designated lane for the whole game.
2. Players at the headboard will alternate pitching bags until each player has pitched all four of his/her bags.
3. Players at the footboard will take score and resume pitching back to the other board.
4. The top of an inning is completed when both players pitching from the headboard pitch all four bags; the bottom of the inning is completed when the remaining players pitching from the footboard pitch all four bags.


Do you have any regulation cornhole bags questions we left off the list?  Share your concerns with us!
An Educational Past Time: Stamp Collecting

An Educational Past Time: Stamp Collecting

Stamp collecting, also known as philately, is a popular and educational past time.  Stamp collectors save stamps from letters, especially those from other countries.  They also search out old stamps that represent a past time.  Stamp enthusiasts can be found everywhere.  Their notebooks and glassine envelopes filled with stamps are fascinating to look through.  Many of the stamps they collect are very valuable as well.

Materials needed for starting a stamp collection include a stamp album and special mounting tapes called hinges.  Tools you will find useful are a pair of small tongs or tweezers for carefully lifting delicate old stamps and a magnifying glass for finding minute details.

The beginning philatelist can start with the stamps on the mail that arrives this very day.  To remove a stamp from an envelope, carefully tear away the envelope from around the stamp being careful not to tear the stamp itself.  Now soak the stamp in warm water.  The remaining piece of envelope will turn loose, allowing you to lift the stamp from the water with the tongs.

Lay the stamp on absorbent paper.  When dry, place a heavy book on top of the stamp to flatten it.  As a past time, stamp collecting requires precision and neatness.  Place the dried and flattened stamp in the album by using one of the hinges, or store it in one of the tiny glassine envelopes unique to stamp collecting.


Many collectors specialize in collecting currently available commemoratives as a past time.  Stamp designs are varied, beautiful and interesting.  Commemoratives are those special stamps that are released by the post office for a limited time.  They can commemorate special people or events.  Most nations print commemorative stamps from time to time.

American stamps have featured wild life, artists, antiques, and many other themes.  In fact, there is an annual contest in which American school children compete to draw the best picture of a wild duck.  The best duck art is featured on a stamp.


A fun way for a young person to build a collection of foreign stamps is to find a few pen pals in foreign countries.  This activity helps people make friends as well as broadening their outlook.  There are also companies that will send out introductory collections of foreign stamps in order to get stamp collecting customers on their mailing lists.  These collections are usually colorful and contain a wide variety.

Stamp collecting is an educational past time.  Stamp collections can sometimes become very valuable to the right people.  If you are looking for a new hobby or past time, stamp collecting might be for you!
Free Scrapbooking Ideas: Fundamentals of a Simple Scrapbook

Free Scrapbooking Ideas: Fundamentals of a Simple Scrapbook

Free Scrapbooking Ideas: Fundamentals of a Simple Scrapbook | Maybe you have heard the term, “simple scrapbooking” and have some ideas about what it is. But with exactly is simple scrapbooking and what are its components that gave its name?

Free Scrapbooking Ideas: Fundamentals of a Simple Scrapbook
Simple scrapbook is not your usual album that relies on the chronological events. It does not focus on the usual things such as family traditions, daily routines, hopes, and dream. It sits itself outside the traditional album. It is small, short and more manageable. It is simple and focuses on the sidelights of your life or the small details that is overcastted by the usual things that matter to you. In other words, the traditional scrapbook is like moments taken on pictures while simple scrapbook are the things that happen before and after the pictures were taken.

There are 5 terms that describe what simple scrapbook is: Freedom, Format, Framework, Finished, and Fast. These five are further discussed below.

Freedom as referred to making a simple scrapbook means that the one creating it has the liberty to simplify all the events that would be included on the scrapbook. The freedom to explore other aspects of life, use of non-traditional elements, and capture things that may not be seen on regular scrapbook. And most of all; the freedom to make the scrapbook as the exact interpretation of the creator’s idea.

Format shows the uniqueness of one scrapbook from the rest; and somehow, each scrapbook follows certain format. This means, a simple scrapbook has a size, content, and characteristics that is relatively the same with the rest of the scrapbooks but entirely uses different in approach. This makes one simple scrapbook stand out from any other scrapbooks.

Format also sets a particular theme or color scheme of one scrapbook. The colors used and the designs made are some of the usual components that bring out a simple scrapbook into a work of art. The placement of various elements also brings a lot of impact on the overall image of the scrapbook.

Framework is one characteristic of the simple scrapbook that is entirely unique from the rest of the scrapbooks. The framework is often defined as the group of pages including the table of contents and the title, dedication or the introduction page, section pages, filler pages, closing page, and materials file that show that overall structure of the scrapbook. Oftentimes, it is the first thing made since it defines what is the flow of the album. In simple terms, the framework is like the blueprint and the foundation of the album.

Another distinct characteristic of the simple scrapbook is the idea that once it is started, it can be finished. It is unlike the chronological album that is continuously filled up and may not be finished as started. Factor such as unavailability to add pages on the chronological album hampers the excitement once have. In simple scrapbook, you can assure yourself that once you start it, you can finish it. This is because you are working on a specific framework that is specifically made to finish. And since you are working on this framework, you will exactly know how far can you go and how many pages you will use. Once you have met this, your album is done.

A chronological scrapbook takes a lot of time to create. And as was mentioned, you may not still finish it. Simple scrapbook is different. You can finish it as soon as you start it. Again, this is the result of the framework that you follow. In fact, after you have finished the framework, you are that close to finishing it.

If you have decided to create your simple scrapbook, you have to know 3 things.

  1. You should identify your purpose. Ask yourself, “Why am I doing this?” “What kind of emotion or celebration would I want to put in the album?”
  2. You have to create the format. Identify the size of the album and the theme to use. Know how to organize the ideas and put them to paper. Create the framework.
  3. You have to prepare the materials used.

Once you have all these, you will easily create your own simple scrapbook.
Free Scrapbooking Catalogues: Sources of Tips You can Use

Free Scrapbooking Catalogues: Sources of Tips You can Use

Free Scrapbooking Catalogues: Sources of Tips You can Use | So it is spring once again. And you are faced with the idea of doing a general cleaning. In most cases, you find the most valuable materials you’ve always kept when you clean up your rooms, right?

Free Scrapbooking Catalogues: Sources of Tips You can Use
It is not impossible for you to come across with pictures of you with friends and family on several occasions. They may have been just left out in a box or in one corner of the room. When suddenly the idea of compiling them strikes you. How can you compile them by the way? What idea do you have in mind? Would you not allot time for creating a scrapbook for those photos you’ve suddenly found? Yes, a scrapbook will be the best way to keep the memories in the photos alive once again! Are you ready for this venture then?

Several individuals are too much hooked into the idea of scrapbooking. They see the creation of scrapbooks as one fine way of spending a leisure time. While this may be a happy experience for most people, there are also those people who have not even experienced the joyous pleasure brought about by scrapbooking but who are always willing to give it a try.

When you are a novice in scrapbooking, free scrapbooking catalogues can be of great help to you. These free scrapbooking catalogues may be available online or in several local arts and crafts stores. They are in themselves filled with worthy information when it comes to scrapbooking. Simple steps are also given out plus the most essential scrapbooking information that novices will need to know about.

At a simple glance in your photos, they may have been mixed up with those from other occasions. Why not sort them out first according to events? In such way, your photos for scrapbooking will be organized. The essential steps that you need to dwell in before starting with the scrapbooking are gathering your photos, sorting them out, labeling them, and of course finally, storing your photos in the scrapbooking album. These steps are likewise included in the free scrapbooking catalogues that you will likely find whether within your locale or via the internet arena.

Let us dwell with the discussion of the steps first.

Gather all photos you have. As time passed by, you’ve earned a lot of photos and all throughout these years you may likewise have misplaced them. They may be in the garage, in the attic, in the closets or drawers, in the basement, and so on. Cleaning time provides you with the time to gather them up and recall the moment when they had been taken. What occasions are involved in the pictures? Who are with you? After gathering them up, go to a larger space so you can all spread them out. In this way you can decide on which photos to include in the scrapbooking. Think of what kind of scrapbooking album you will use. The size of which is determined by the number of photos that you will include in your scrapbooking project.

Start sorting out the photos. There are certainly several ways to sort out your photos like doing it according to family, relatives, and friends or by sorting them out according to chronology. Most people go for the latter option. Your pictures may date back to several previous years but that will be okay. Just allot time to do that. After you have sorted them out, start thinking about the theme of your scrapbook. Will it be holiday seasons-related? Baby’s baptismal? Heritage or family stuff? Whatever theme you are able to come up with, make sure that the photos you’ve chosen will explain a story and will definitely make sense!

Label the photos. After sorting them all out, label them according to occasion or event so that you will be given a clue as to what category they belong to. You need not label each photo for it will be too hard on your part. Simply categorize some portions or better yet put them inside an envelope with labels so you know what to get once you start with your project.

Finally, store them in safe places. When you are not yet ready with your scrapbooking materials, first keep the photos safely. Likewise, safe keep the rest which you will not be using. Three elements must be kept away from the photos. They are the humidity, heat, and light.

You see how beneficial free scrapbooking catalogues are? They surely mean to help you a lot!
Free Digital Scrapbooking Programs: Product Samples to Test before You Buy the Real Stuffs

Free Digital Scrapbooking Programs: Product Samples to Test before You Buy the Real Stuffs

Most of us have been so used with the idea of scrapbooking as a combination of paper cutting, photo gluing and sticking bits of nice materials together. All these would be laid on a piece of cardboard, paper or any foundation the scrapper would like to use as a medium.

Free Digital Scrapbooking Programs
But there's nothing that computers can't infiltrate. They influenced literally everything from our works to our personal lives and even the crafts that were supposed to be made by hands. Well, some people may have viewed these changes negatively. Nonetheless, so long as a person does his art on whatever technique he prefers, he still is able to fulfill many of life's pleasures.

Computer scrapbooking or betterly known as digital scrapbooking is done by means of laying out pages with the aid of computer softwares. This basically entails the manipulation of photos, graphics, borders, texts and add-ons using digital devices.

Like with conventional scrapbooking, the pages may be printed on high-resolution color printers that the scrapper will then paste on traditional scrapbooks. If you would not want to get bothered with pasting or the bulk of storing albums, you always have the space saving option of strong these in your computer or on a CD or DVD as tokens of memories you would want to share with others.

There are a number of computer programs that you can make use of when doing digital scrapbooking. The three most popular are Adobe PhotoShop Elements 2.0 and CS, Microsoft Picture It!, Lumapix, and JASC's Paint Shop Pro.

All these programs are so effective in helping their users manipulate the designs. The basic features include photo cutting, background replacements, change of colors, text adding, border placing and over-all graphic designing.

The common problem though with many computer softwares for digital scrapbooking is that users tend not to get the full controls. All have their learning curves and would require some mastery. Often, it is difficult for the user to make the program do things as they wish. Now, if you are more experienced with a single program, try to master it first before you choose to switch softwares. After all, if it worked great for you then it might help you better with your other projects.

Aside from the softwares we have already mentioned, it would be good to point out some other choices that you would find interesting. Some of the easiest programs that you can manipulate are the Hallmark, CK, Scrapbook Studio, and Scrapbook Assistants.

All these are designed specifically for digital scrapbooking. S compared with high-end softwares such as those we have mentioned above, these lower-end choices are quite less expensive and easier to use. However, they offer less flexibility in creating layouts.

Digital scrapbooking softwares that have higher learning curves have the tendency to require you to bring out the best of your creativity especially when you're done figuring out how the whole thing works. on the other hand, there are programs that are so versatile that they would allow good use other than scrapbooking purposes.

If you would want t meet the balance and stay in the middle of the road, you might want to choose Microsoft Digital Image Pro. It is less expensive than PhotoShop and will offer lots of advantages over scrapbooking programs. It is not also as hard to master as compared to other programs.

Well, if you are having doubts on what computer program to buy or you are still more comfortable with traditional scrapbooking, the option of downloading free digital scrapbooking programs in the net is always available for you.

Be forewarned though that many free digital scrapbooking downloadable are not as efficient as those you can buy from online and local retailers. They serve more like samples from which you can base your judgement of the products. Well, that expected. The web is a large pool of business propaganda and advertisements. We mean nothing wrong with this, only you have to lower your expectations. After all, websites are not giving you the products, they're only showing you how a specific product works.

If you are wondering how to make things work, be assured that most free digital scrapbooking programs are equipped with tutorial lessons that will lead you to simplified step by step instructions.
Digital Scrapbooking Software: Preserving Memories Without Hassles and Extra Expenses

Digital Scrapbooking Software: Preserving Memories Without Hassles and Extra Expenses

There was a time when taking pictures and collecting them can really put a big hole into your pocket. Aside from the initial photo taking, there would be the hassle of choosing where they will be developed so that you will get the perfect photo quality. After that, you still need to buy the things you need to make a scrapbook. Sometime later on, you will finally see the end result with only a few dollars left in your pocket.

Digital Scrapbooking Software
That was before. With the creativity of human mind along with technology, people can use digital tools and equipments to save on the effort and resources needed to have those photos stand the test of time.

People can now say goodbye to films and albums that are only left in one dark corner of the house. Photos can now be saved in computers complete with scrapbooks that you can add words and messages into.

The need of digital photos and scrap booking arose from the need of people to take more and more pictures of themselves, their families and friends to look into some years from now. The need to share them with other people is also another reason.

The traditional way of sending pictures through mail can be a great waste of time. Besides that, you are never certain if the photos will arrive on time and in proper condition.

The Internet has brought about the modern way of sending photos without you leaving the comfort of your own home. All you need to do is compile them into a scrapbook file and share them with people in any part of the world. Before you know it, your photos will be seen by your loved ones wherever they may be.

With all these capabilities, the only thing that is required of people is to be creative on how they are presenting their photos. Digital scrap booking is the solution.

It is said that when digital scrap booking was introduced, its market already reached up to millions. Just imagine the number of people wanting to have their photos stored and shared to others and you will be able to figure out why they embraced this technology easily.

This has become the answer to keeping photos intact and in good condition so you can always look back at the happy times whenever you find yourself lonely and out of contact with the persons that you love.

This is also the solution to eliminating the need to have an expert do the work for you. You may find yourself out of idea on how best to present your picture and is just wasting your time staring at them laid out in front of you.

Have you also ever felt frustrated when you cannot seem to get the proper shade of color or the perfect background when you took your picture? With digital capabilities, you will be able to do that with just a click of your mouse. All you need to know are what functions to use and how to better enhance the quality of your photos using the software available.

Digital scrap booking will let you have the designs and styles you need and make it look like the real thing. The only advantage is that you need not visit every bookstore of stationery and shop around just to get the right materials. These things are already built-in in the software of your choice.

You can start by looking into sample of scrapbooks that are available in every software package. Once you have an idea on how to make your own, you can make use of your creativity to make one that suits your personality and style. You do not need to cut out or choose lettering styles. You can do that with the drag on your mouse.

If you want to take your creative juices into another level, you can also do slide shows and turn your pictures into screen savers. With the Internet at your disposal, you can look up tips and techniques to use with your digital scrapbook. There are articles and advices you can read online on how to perfect that scrapbook.

You can also take an online tutorial from the experts who can help you with layouts and designs. You do not have to have that talent within you. Your creativity is enough to make you a scrapbook that your family and friends will love and will want to see some more of.
Digital Scrapbooking: Is it for you?

Digital Scrapbooking: Is it for you?

The digital artwork is making its way into the mainstream; so as the digital scrapbook. For sure, we have certain understanding about digital art, but what about digital scrapbook? Is it the same with digital art?

Digital Scrapbooking: Is it for you?
The two are both similar and different in many ways but we are not here to discuss deeply their differences and similarities. We are here to focus on the digital scrapbooking as an alternative to the traditional scrapbook making.

Traditional scrapbooks are make by hand with several materials such as papers, pens, letter cut outs, adhesives, and other embellishments you can think of. The main principle is; to create a wonderfully decorated page that would give better meaning on the message you want to address. Digital scrapbooking works on the same principle too. You create unique page with decorations to enhance the meaning of the massage you want to address.

What sets the two apart is the method of achieving this principle. As mentioned, traditional scrapbooking uses material such as papers, pens, letter cut outs, adhesives, and other embellishments. Digital scrapbooking on the other hand uses computer graphics that replaces these traditional materials. You may say it is harder to work on the page design on the computer than on the actual page (traditional scrapbook). But, to be honest, it is almost the same.

Take the following for example:

The traditional scrapbook will work on a background or layout (sometimes called a template), pictures, texts, and embellishments. The process goes like this: you place the pictures on the background, place some embellishments of your type, and write some texts.

The digital scrapbook will work on software with all the available digital embellishments and texts. You have scanned pictures to be placed on a chosen background. Put some texts and add more design. Then, with some more editing on the colors and borders, you have created a scrapbook page.

(Speaking of software. There are several software that would let you create digital scrapbooks. These are Microsoft® Digital Image Pro, Photoshop® Elements or Adobe® Photoshop®, Ulead PhotoImpact®, or Jasc Paint Shop Pro®, to name a few.)

Oftentimes, it is much easier to create a digital scrapbook than a traditional one. This is because software that lets you create digital scrapbook with ready to use templates for texts and backgrounds, not to mention the editing tools you need. These features make it easier to create one unique page. Downloadable templates are readily available over the internet to widen up your choices on text, embellishments, and background. This is unlike traditional scrapbook that every thing is yours to make; from the background to the cutting of the decoration.

To further illustrate how does a digital page is created, here are the steps to follow:

· Create a new image from a blank canvas

· Define the size of the page you will use.

· Enter the settings you want to adapt.

· Add the photo

Photos determine the color scheme of the layout, therefore, you may want to see first what picture will you going to use before determining the mat of the canvas.

To add a photo, you must first save one on a file. You can either scan pictures or take them from your digital cameras.

· Create the background

Now that you have a determined canvas and photo, it is time for you to select your background. Here, the choices are endless. You can download images from the internet or use your photos to be the background itself. You can edit the texture of the background to match the theme you want to achieve.

· Create the photo mat

Photo mats let the background and the photo meet on a certain point.

· Add the text and embellishments

Ready made texts and embellishments are one good feature of digital scrapbooking software. This helps you to put important touches fast and easy.

· Apply some finishing touches

Final editing in scrcapbooking is as important as placing everything in order. Make use of built in features such as shadows, emboss, effects, and others. This would help your page look more attractive as it highlights whatever you want to be highlighted.

Coloring

[Coloring][recentbylabel]

Culture

[Culture][recentbylabel]
Notification
This is just an example, you can fill it later with your own note.
Done